You’ve heard the news from Salesforce events over the past year, and now you see a visual reminder whenever you interact with workflow rules in Salesforce: Flows are the future of Salesforce automation. With all of the features available, it’s becoming more and more important (whether we “have to” or not) to begin moving our workflow rules (and processes) to flows so we have a standard place for our automations.
Depending on the number of items in your Salesforce Org, this can seem like a daunting task. But as you’ll discover in this article, there is an automation tool to help and even without full automated migration you can “re-use” some of the actions you have already created.
As a starting point in your migration project, begin with taking time to evaluate your technical debt before migrating everything. This will save time in the long run, instead of moving over each individual rule without question. Use this change as an “excuse” to review if your existing rules are still needed, or can be combined or re-organized into a more logical automation strategy. Your future self will appreciate this effort today!
In this article I’ll highlight how to migrate two workflow rules to flow. One example using the automatic tool, and one example manually creating a flow. And I’ll cover some extra tips for migration as well. If you’re new to using flow, this may also let you see how the features compare.
Automatic Migration From Workflow Rule to Flow
This feature is in Beta for Spring ‘22 allows you to automatically change workflow rules to flows. Full documentation is available here.
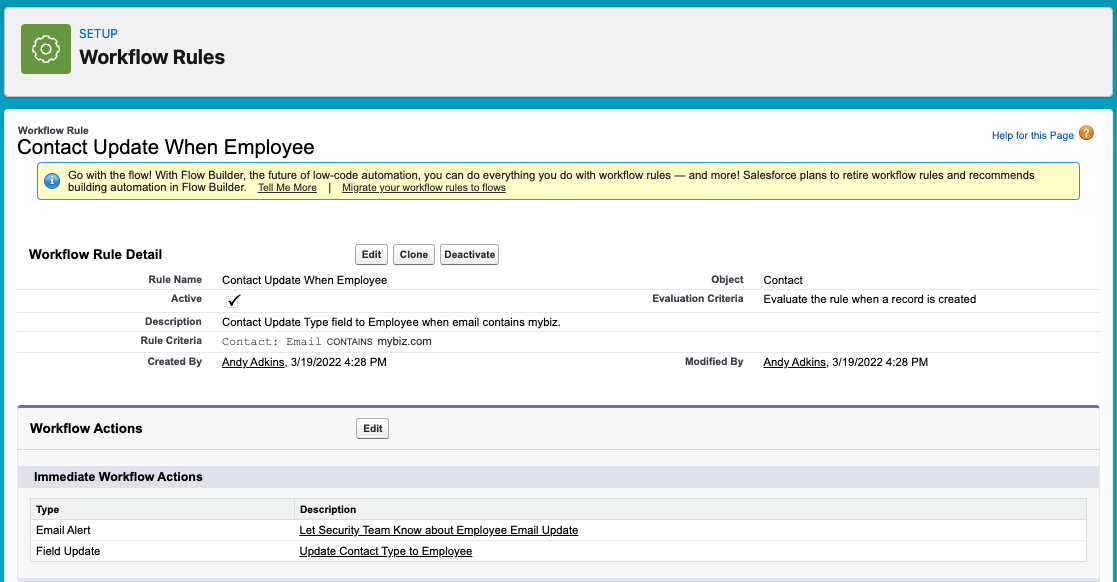
For this example, I have a workflow rule on the Contact which sends an email alert and performs a field update. There is a yellow banner at the top of the Workflow page with a link to migrate workflow rules.
Click the link for “Migrate your workflow rules to flows” to start.

This brings up a list of all the workflow rules in your org. You can sort by the columns, and Object may be the most helpful to find the right rule.

When you find the rule, you can either select it and then click the “Migrate To Flow” button, or there is a down-arrow at the right to select and click “Migrate To Flow.”
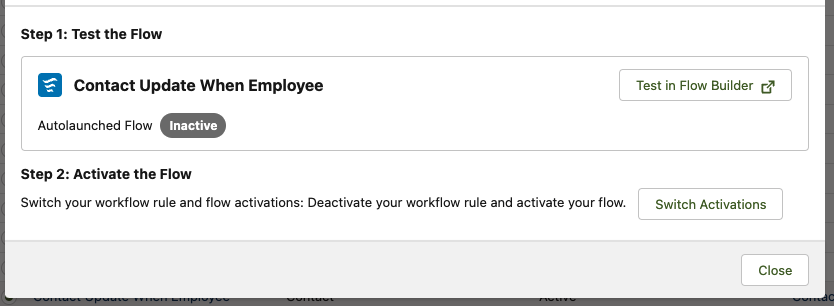
Salesforce goes to work and makes the flow. If this is successful, you will get a results screen that has two steps. The first button is labeled “Test in Flow Builder”. This will open in a new window, and will be good for you to review the flow, and also to debug and test.
Keep the original tab open, however, because there is the handy button to “Switch Activations” which will deactivate your workflow rule and activate the flow.
Here is the result flow from my example workflow rule. The rule criteria is captured in my “Start“ element, the field update is captured in the “Update Records” element, and the email alert was moved to an “Email Alert” element. Nicely done, Salesforce!
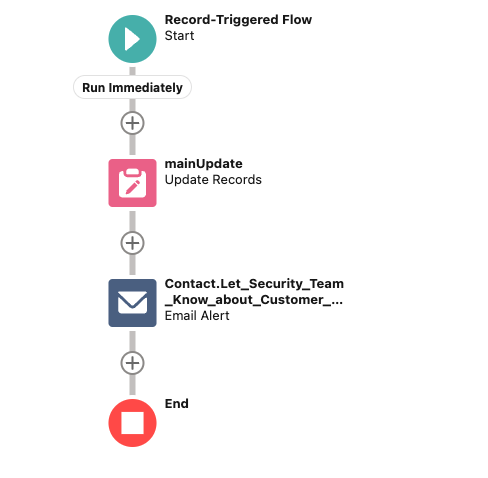
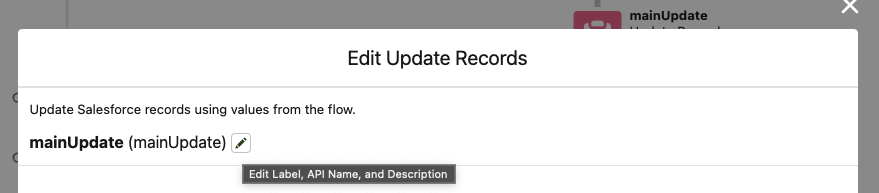
The names of the elements are pretty basic, and don’t fit common naming strategiesl, so I would want to edit the names to be more user-friendly and match my naming conventions. (see the other Gradient Works article on “Salesforce Flow Best Practices: Naming Conventions”
Overall, that’s an easy migration with just a few clicks, which is great! You may now hope that you can move all workflows this way, but unfortunately it probably won’t be this easy.
Unsupported Items for Automatic Migration
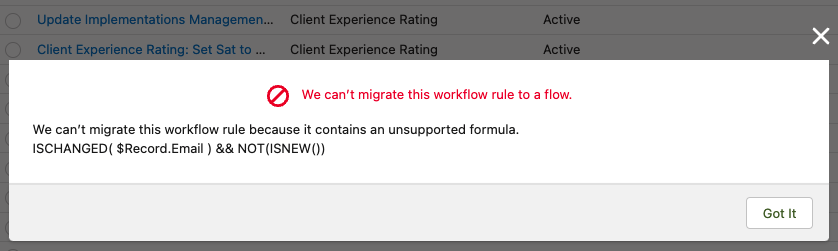
Once you start trying to migrate workflows, you will likely find that many won’t migrate automatically. There are a lot of “exceptions” that will prevent automatic migration. Field Updates, Email Alerts, and Outbound Messages will migrate, but not Task Creation. There are unsupported formulas like ISCHANGED() or ISNEW(). Some examples from Salesforce: Global variables, Record Types, formulas (unless formula always returns true), and inclusion of related records. There is full documentation included in this PDF from Salesforce.
But have no fear, even with manual migration you will be able to replicate a Workflow, and even re-use some of the components!
Manually Replicating a Workflow Rule in Flow
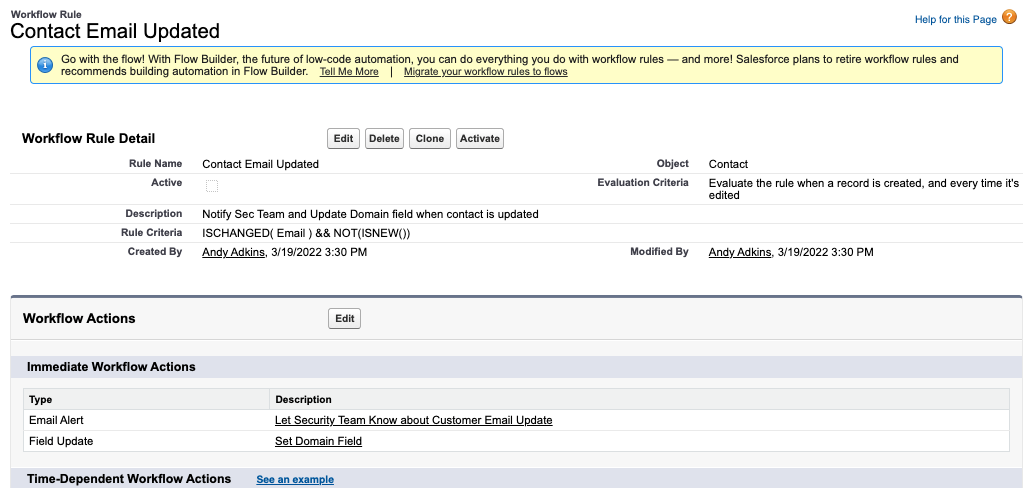
Let’s start with another example workflow rule. We have a rule that triggers when the email on the Contact is updated. It sends an Email Alert and performs a Field Update as well. I tried to convert it but got the message above. So, it’s time to dig in and use our Flow Builder skills!
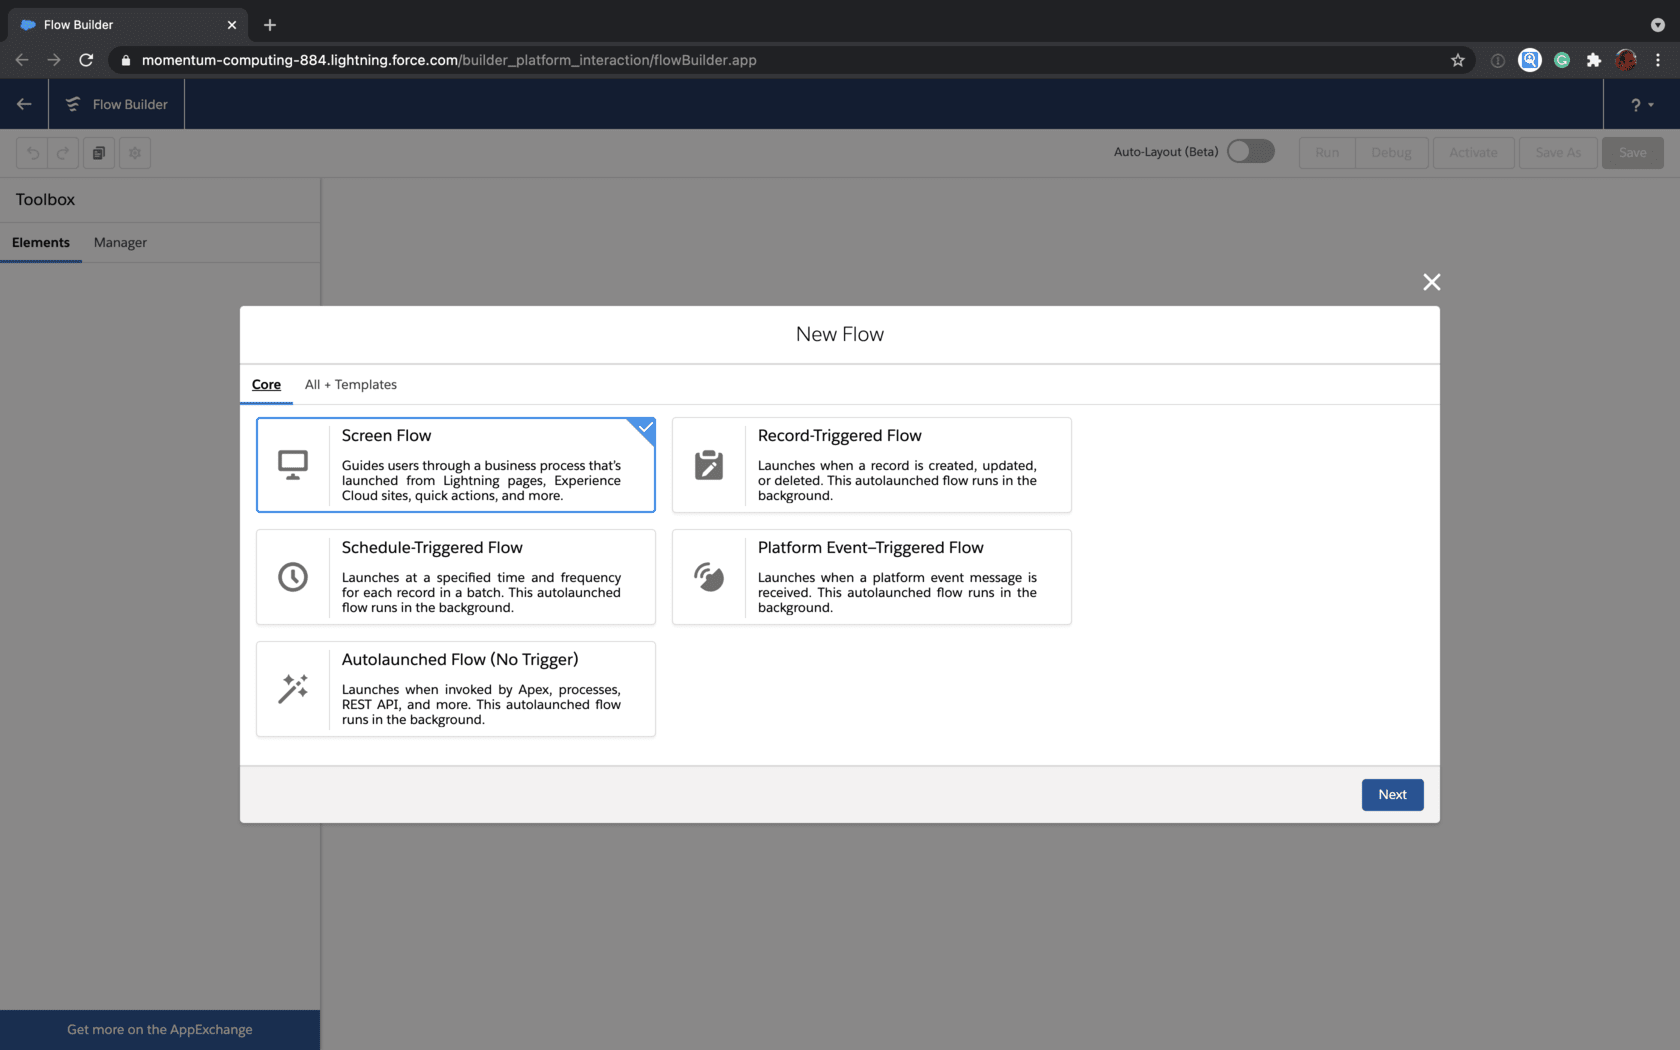
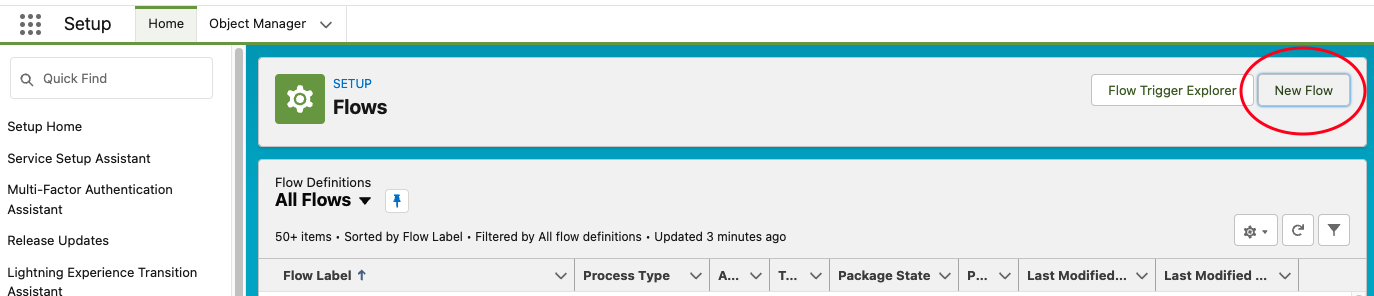
Start by going to the Flow section of Setup, and clicking the “New Flow” button to create a new flow.
Select “Record-Triggered Flow” from the options.

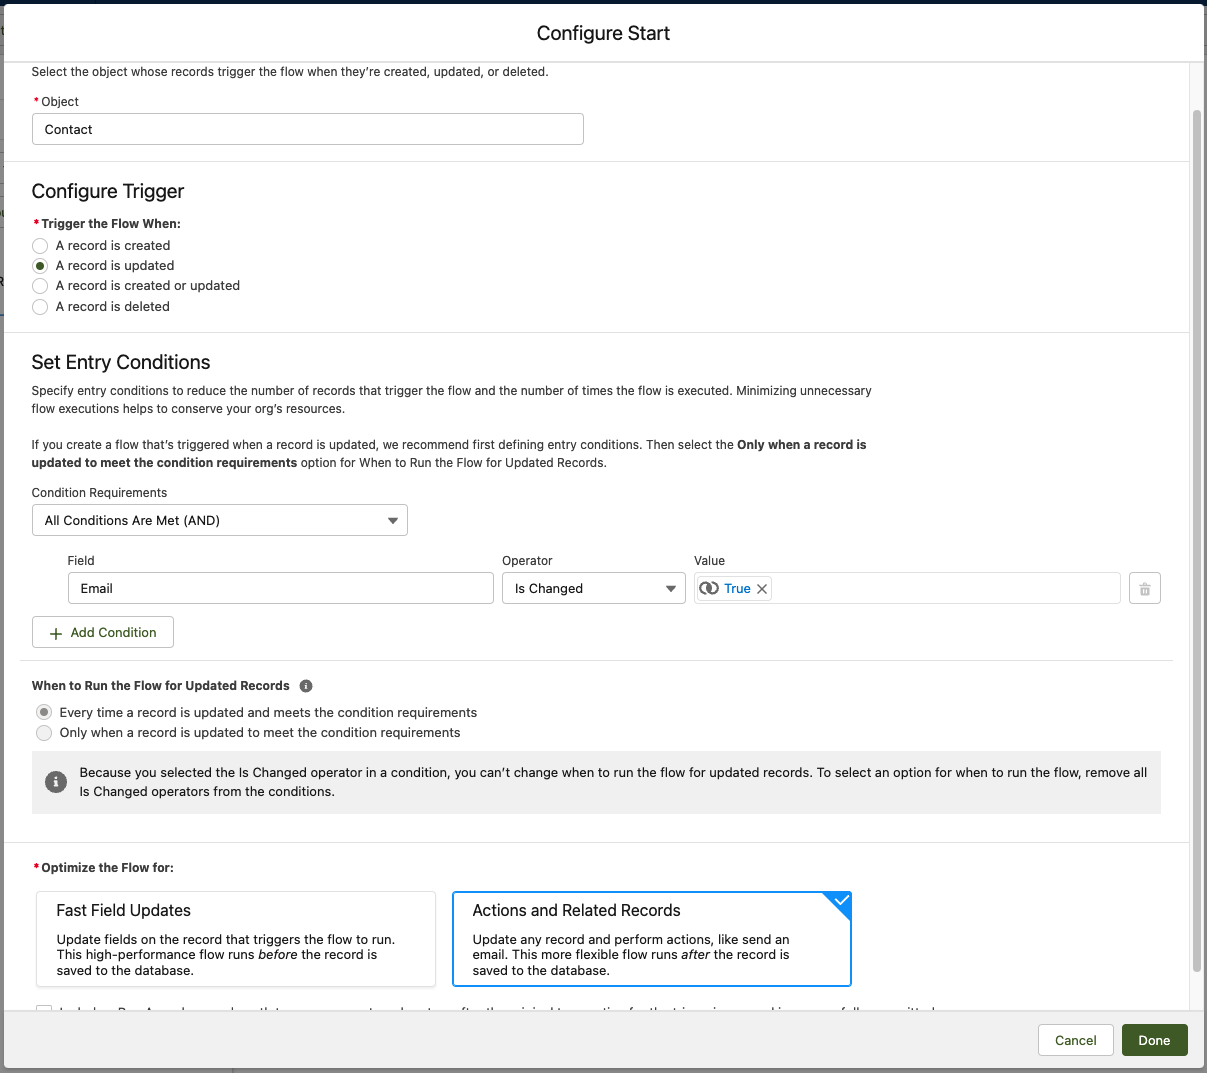
This is where the Start element criteria is set. First, I select my object, which is Contact. For criteria, there may be some decisions to make here because you have more options than you did with workflow. For example, my previous rule had to specifically exclude new objects with an ISNEW() formula, but the Start element lets me pick “A record is updated” and not include created. So then I just need my other criteria which is set in the Condition Requirements section: Select Email as the field, the Operator to “Is Changed” and then from the Global variables, select “True”. Lastly, you have the options for optimization. If your flow will only be updating the current record (this Contact, for example) without email rules, then you can do “Fast Field Updates.” It is great to use this option when you can, but since we need an email alert (which is an action), we’ll need to pick “Actions and Related Records.”
This creates our basic flow, and is a good time to go ahead and Save and name the flow.
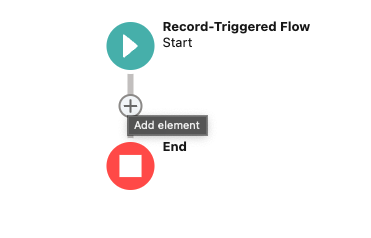
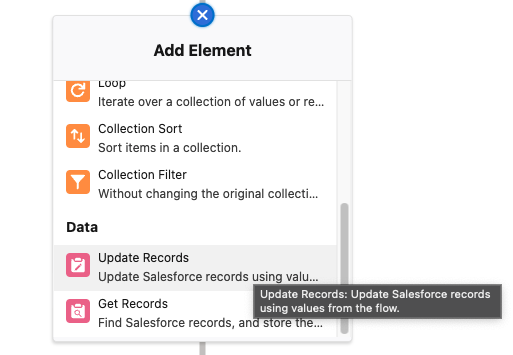
Next, we need to replace the Field Update element from the Workflow. To do this, click the Add Element option, and choose “Update Records.”
Give the element a Label, and for this update we will be using the record that triggered the flow.
Then choose the field to be updated, and the value to be used in the update. If your Workflow has multiple field updates, you would have had multiple items listed. In flow you can click “+ Add Field” and update multiple fields with this one element.

For our example, when you save this element, our field update is done. Now what about the email alert? The great news is that flow can “re-use” the email alert already set up for the Workflow. So we don’t have to pick the template, recipient, and recreate that element.
Instead, add an Action item the to the flow.
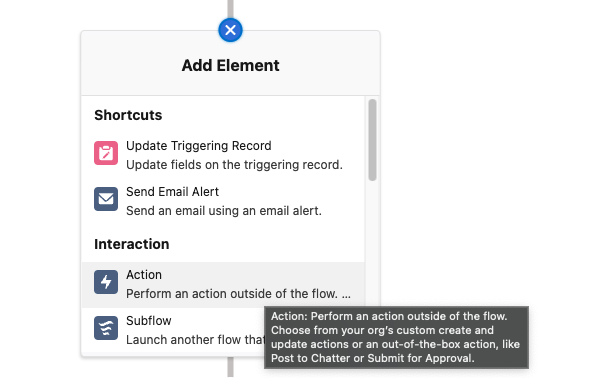
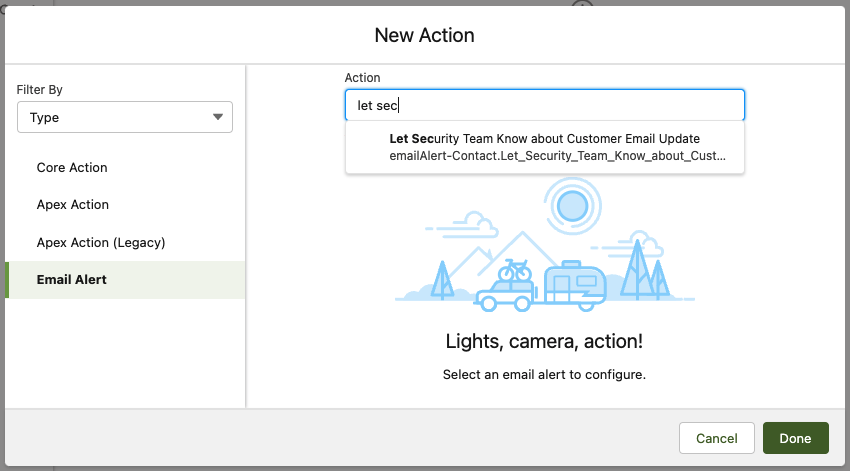
Then, in the Action item choose Email Alert on the left, and start typing the name of the alert from your Workflow. When you see it appear, click the name to make that the action for this element.
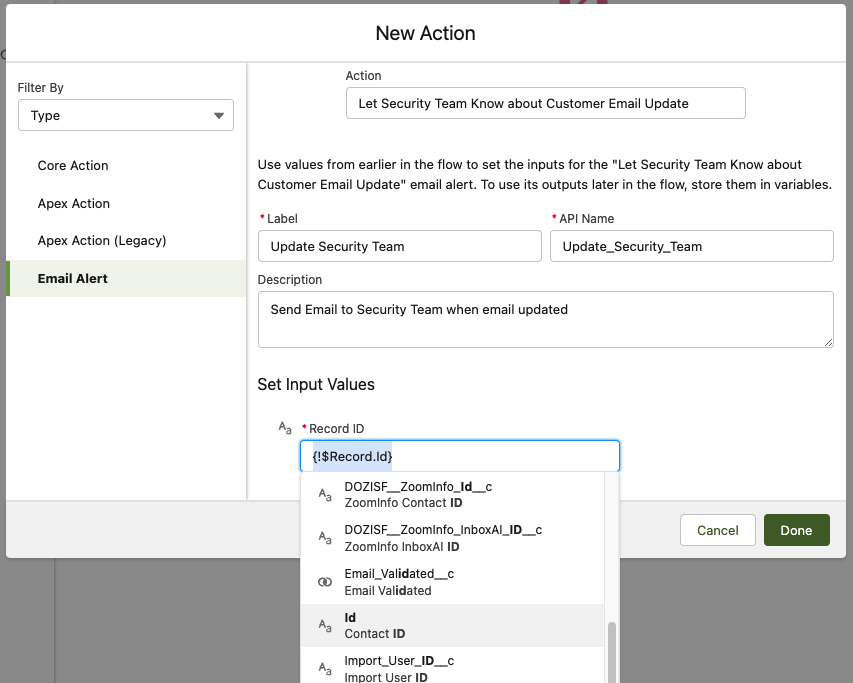
The action is seen at the top, you can give this element a label, description, and any input values. For this one we just choose the Record ID for the contact, by choosing $Record under Global Variables, and then finding the ID. Or you can type {!$Record.Id}.
With that step complete, we have replicated the function of the Workflow in a brand new flow. After testing, remember to activate the new flow, and deactivate the workflow rule.

This example may help with creation of most workflow rules using field updates and email alerts. But remember, you don’t have to create a flow to replace each individual workflow rule. Combining several workflows into a single flow may make this process a bit easier, and also easier to maintain and support in the long run.
But what about the other Workflow Actions that we didn’t cover in our example? What if we were creating an Outbound Message or a Task?
Outbound Message in Flow
An Outbound Message is very similar to what we did for an Email Alert - you can add the existing action to the flow. Add an Action element to your flow, and for the details, the Type to select is “Core Action” and then start typing the name of your Outbound Message action. Select it, and then give the action a name and choose any record variables. (For example, to add an action for an external SMS system)


Task Creation in Flow
As mentioned earlier, task creation actions will not migrate automatically to Flow. For task creation, it will be similar to the Field Update migration, but you’ll choose a “Create Records” element to add to the flow.
You can create one or multiple tasks with this element, and will want to choose the “Use separate resources” option to allow you to select a different Object type, Task. Then set the individual fields as needed. One bonus in flow is that you have more options to set than the action available in Workflow rules.

Time-Dependent Workflow Items
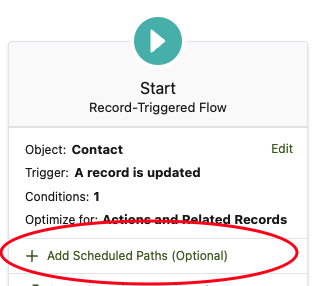
To add time-dependent actions to a flow, as long as your flow is set for “Actions and Related Records” in the start element, you will have an option to Add Scheduled Paths directly on the element, as shown:
Summary List When Re-Creating a Workflow into a Flow
To recap which flow elements to replace specific parts of a Workflow rule:
- Rule criteria - define with the flow definition and Start element in the flow
- Email alert- link to the existing email alert with an Action element in the flow
- Outbound message - link to the existing message with an Action element in the flow
- Field update - use a “Update Record” element in the flow
- Task creation - use a “Create Record” element in the flow
- Time-based workflow - use Scheduled Paths in flow
This covers some of the main use cases for moving workflow rules to flow in Salesforce. I hope this has helped you to see that this change is possible, and can be done in a few steps using the options shown in the documentation above. You can do it! Good luck to you on your migration, fellow Flow Builders!