If you found yourself needing to change the account owner in Salesforce for a lot of accounts at once, this guide is for you.
There are a lot of reasons you might need to bulk update account owners in Salesforce. A few common situations are distributing accounts for reps to outbound, assigning new accounts from a marketing campaign, rebalancing territories, assigning accounts when a rep joins or reassigning accounts when a rep leaves.
This guide assumes:
- You don't have any fancy account allocation software besides Salesforce, Excel or Google Sheets, and something to import data into Salesforce (more on that below)
- You're using a version of Salesforce that has the API enabled
- You're updating more accounts than is reasonable to do one-by-one in Salesforce itself
The process can get a little tedious, but this guide will take you through the main steps:
- Export the accounts that need an ownership change
- Specify the new owner for each account record in a spreadsheet
- Import the account ownership changes back into Salesforce
Let's get started.
Before you start
First, turn on change history before mass updating account owners. That can help you recover if you make a mistake.
Second, be careful with your ids. As you probably know, Salesforce has 15 digit and 18 digit record ids. The 18 digit ids are "case safe" and can be used by case insensitive programs. This is important when working with Salesforce records in spreadsheets, especially in Excel. Many Excel functions, like VLOOKUP, are case-insensitive.
tl;dr: Use 18 digit Ids when working with Salesforce exports and imports.
Annoyingly, Salesforce reports export ids with 15 digits. If you want 18 digit ids you'll need to add custom formula fields on the Salesforce object and use those custom fields in the report. For this guide, I've created two custom fields:
- Account Id 18 (Id_18__c) on Account as a text formula field with the formula
CASESAFEID(Id) - User Id 18 (Id_18__c) on User as a text formula field with the formula
CASESAFEID(Id)
The rest of this guide assumes you've created the above fields.
If you don't have the ability to add fields to your Salesforce org, you can use the 15 digit ids, but make sure you don't try to use them with any Excel functions like VLOOKUP. You may also find yourself needing to do a VLOOKUP on the user's name to get the right id for the import.
1. Get the accounts to transfer
Start by creating a report that contains the accounts you want to transfer. Use whatever filters and columns you like but make sure you include the following fields:
- Account Id 18
- Account Owner
- User Id 18 (pulled from the Owner's User record)
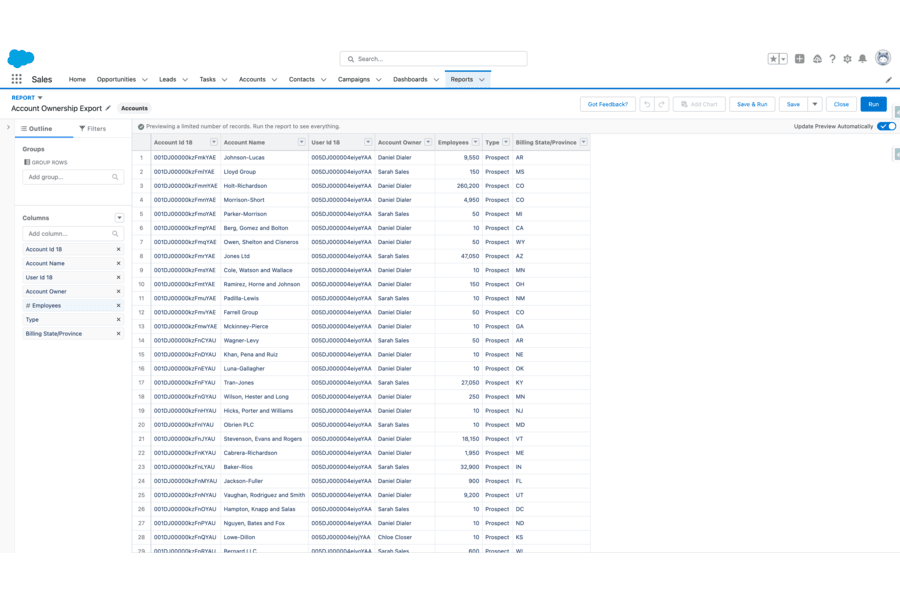
Once you've created the report, run it and export it. Make sure to export details only, formatted as a CSV with "Unicode (UTF-8)" encoding. This ensures maximum compatibility with both Excel and Google Sheets.
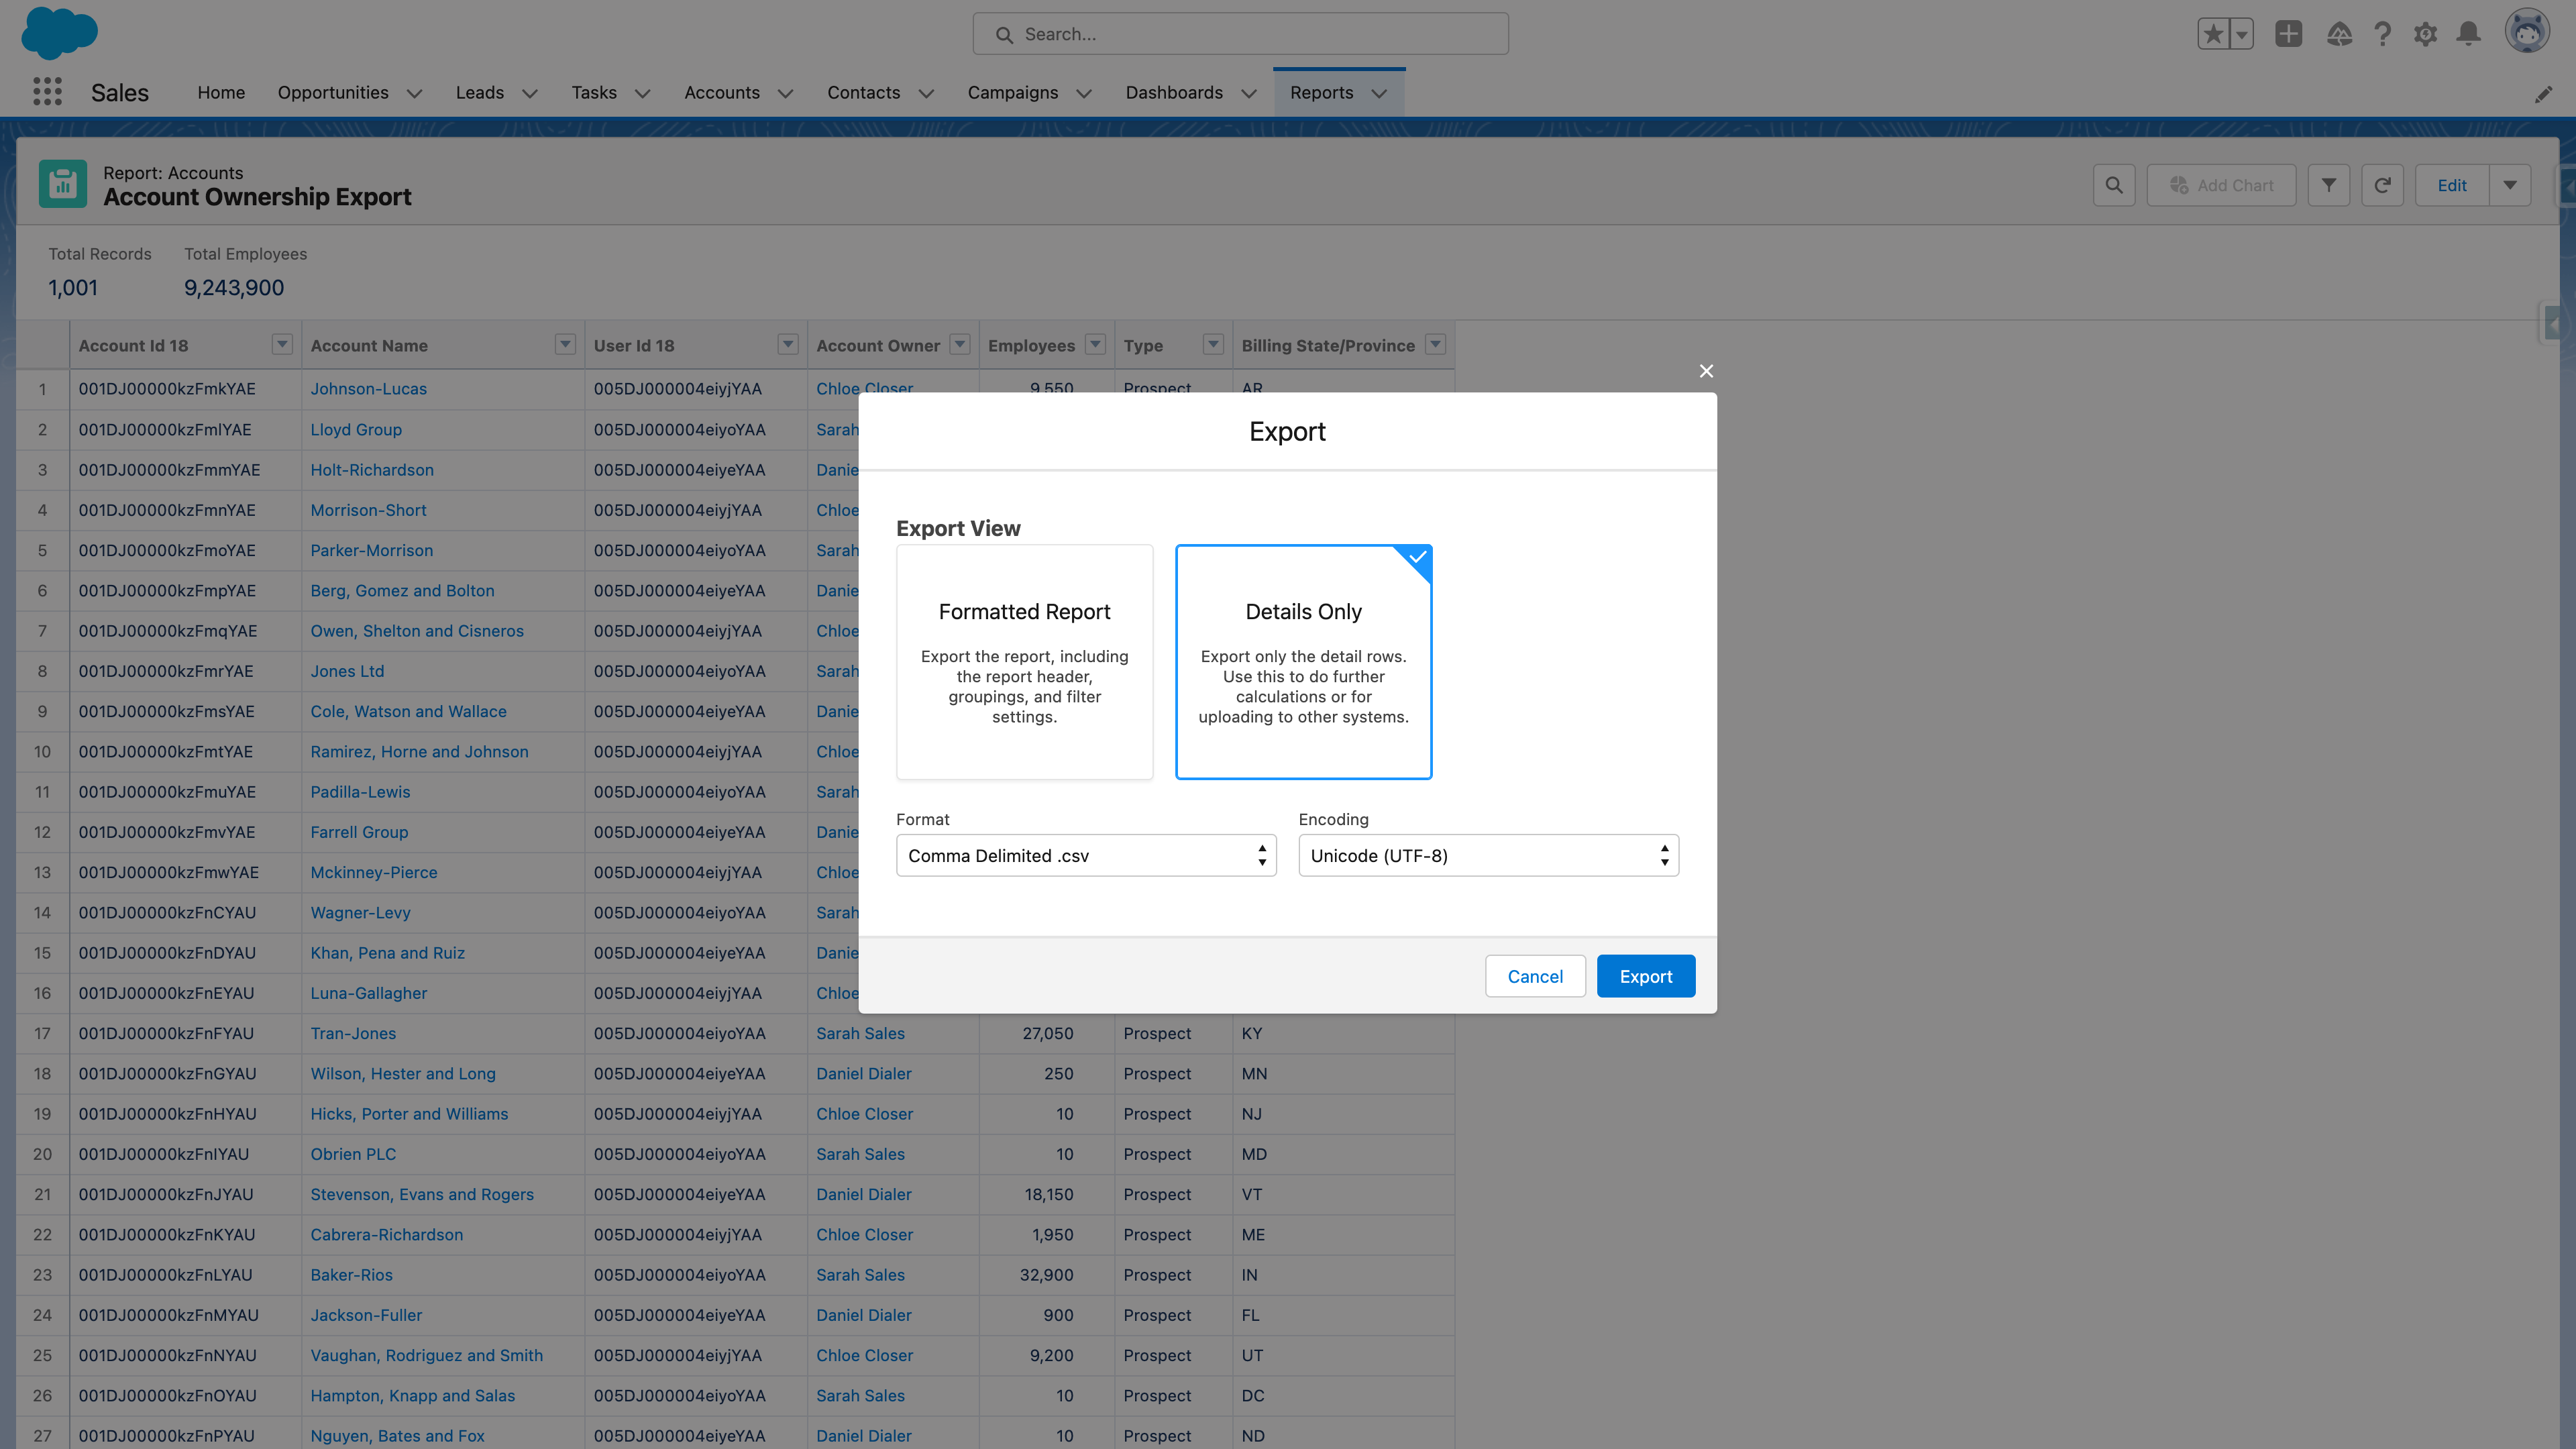
Click Export to download your accounts into a CSV file that you can use in the next step.
2. Specify the new account owner
Import the file into your favorite spreadsheet. I'm going to use Google Sheets but you can use Excel. Your spreadsheet should look something like this:
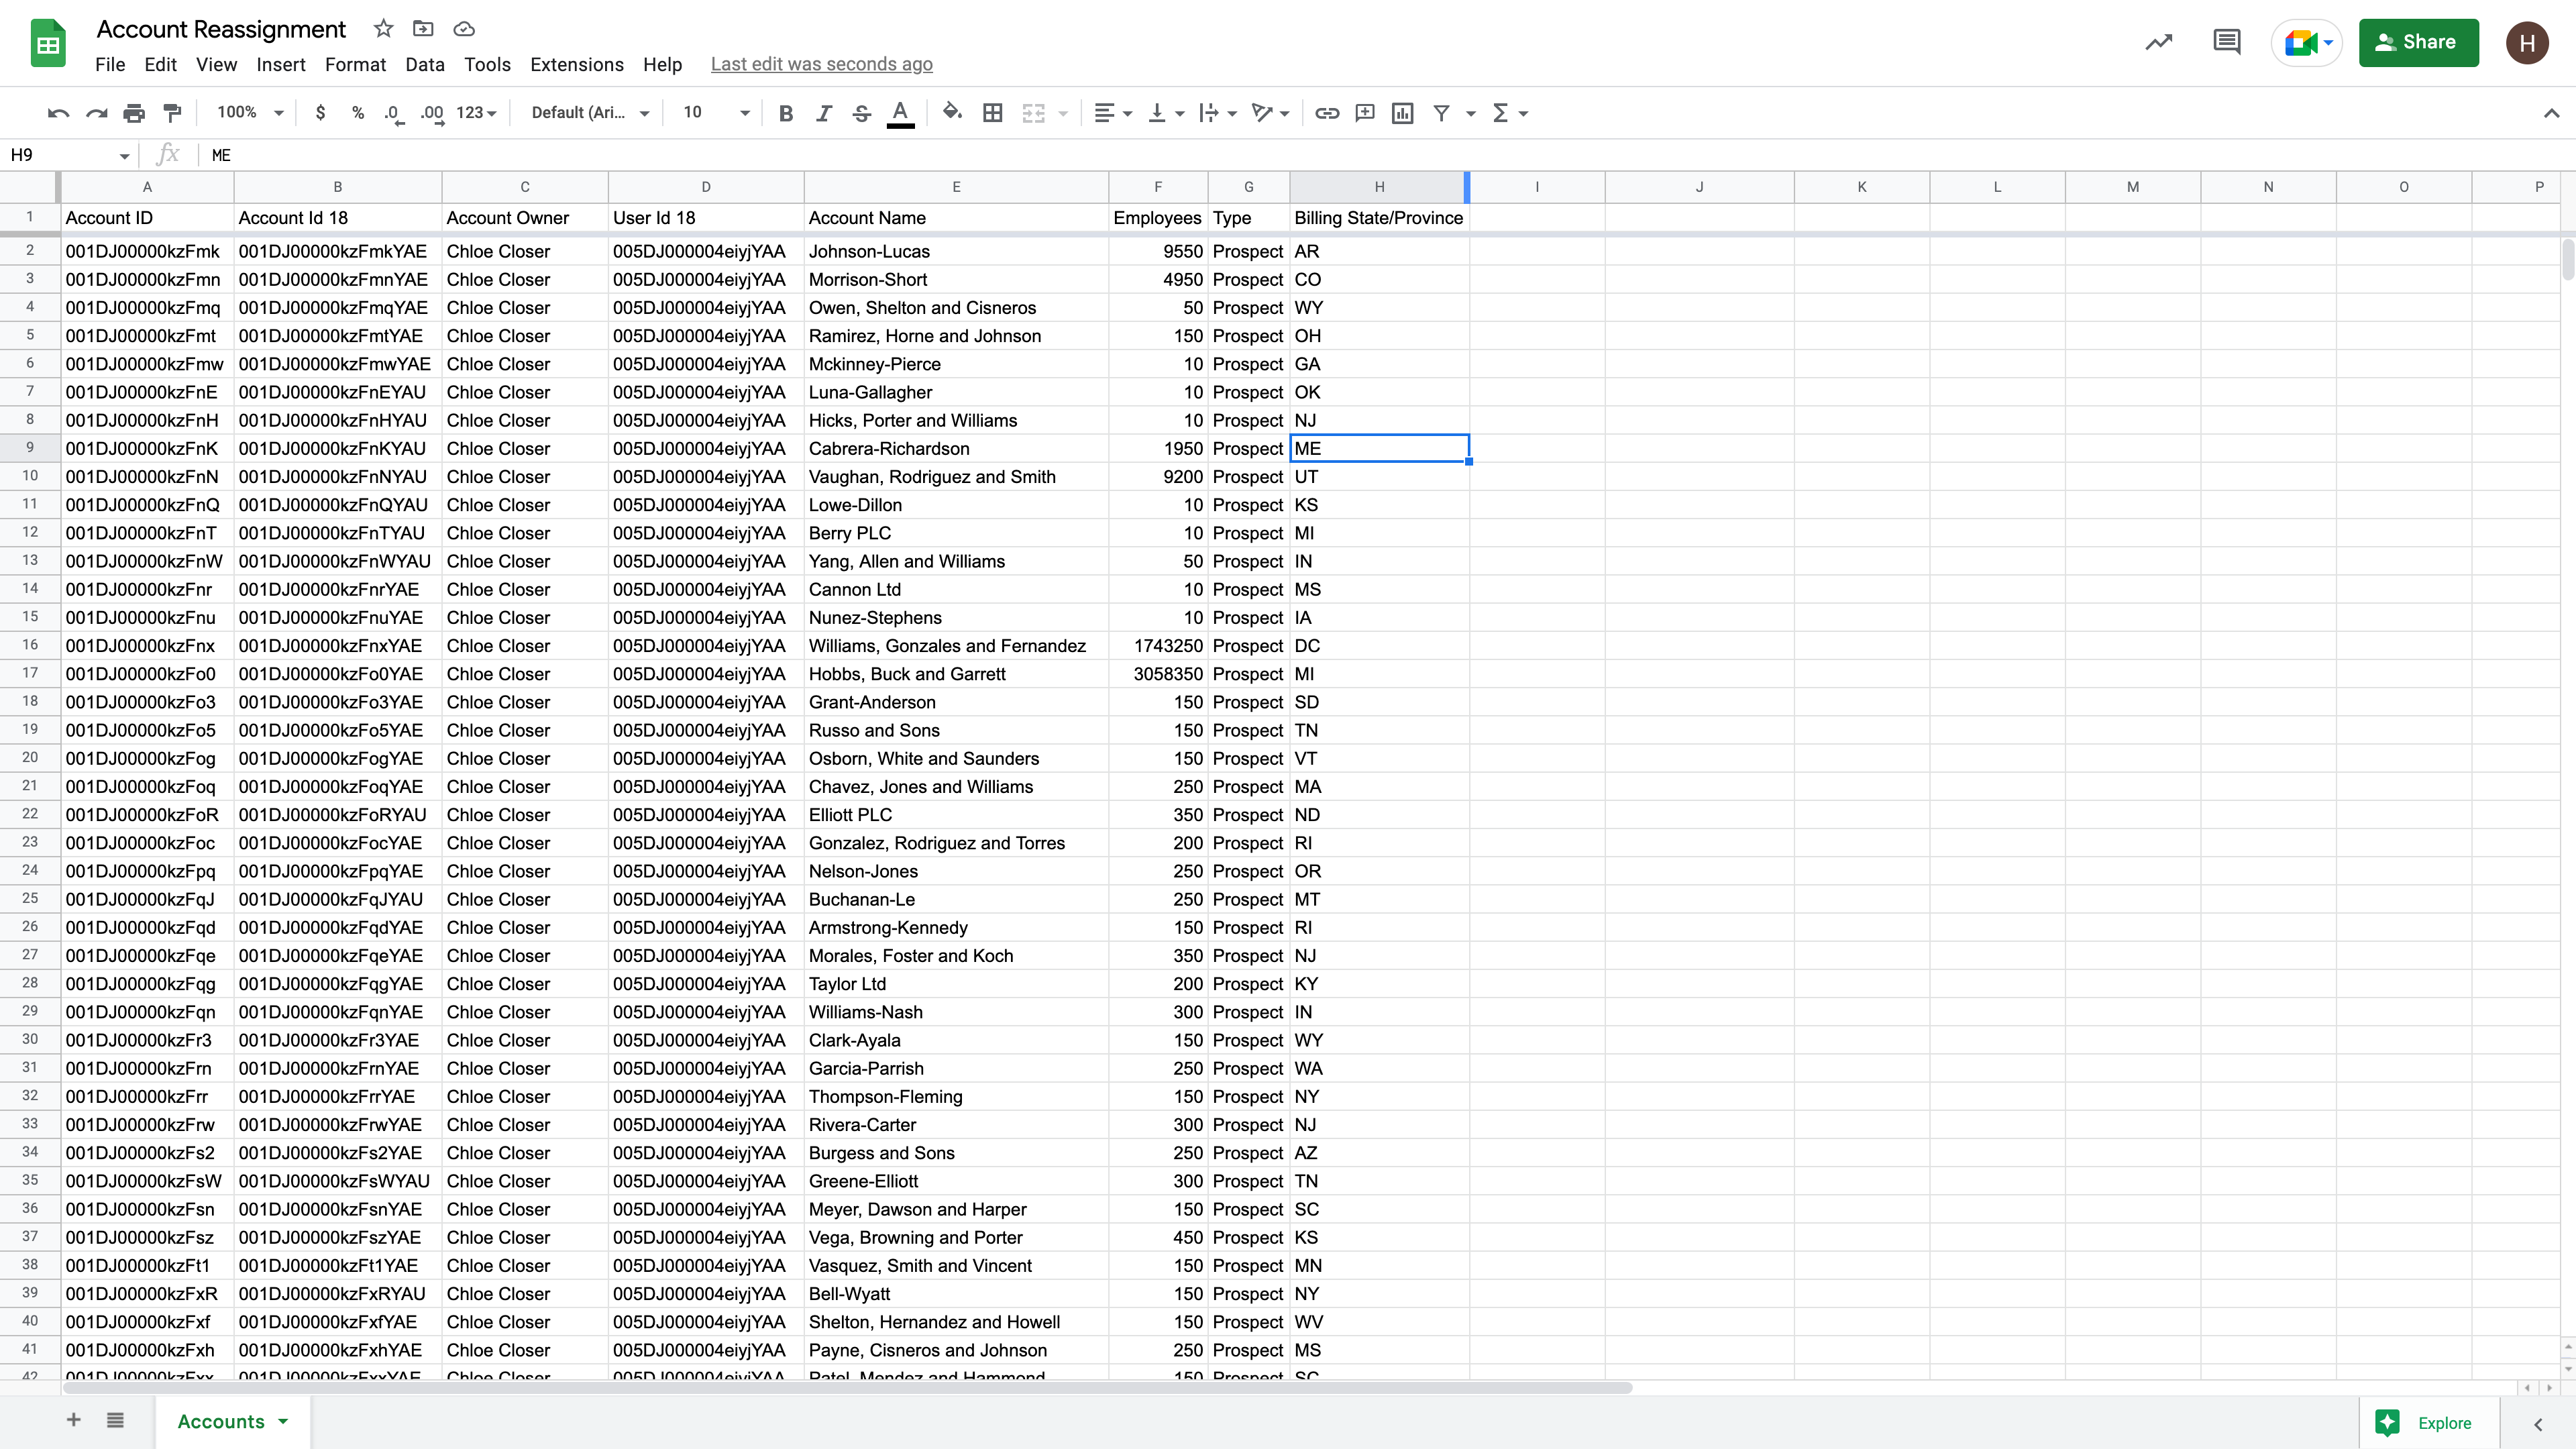
This tells us the current state of the world. To actually change change the Account owner, you're going to need to specify the new owner for each account. Add a column called "New Owner Id". This will be the id of the User you'll transfer ownership of the Account to when you actually load this back into Salesforce.
The simplest version
For each row you want to transfer, set the New Owner Id cell to the 18 digit id of the user who should own the account after you upload this to Salesforce. It'll look something like this:
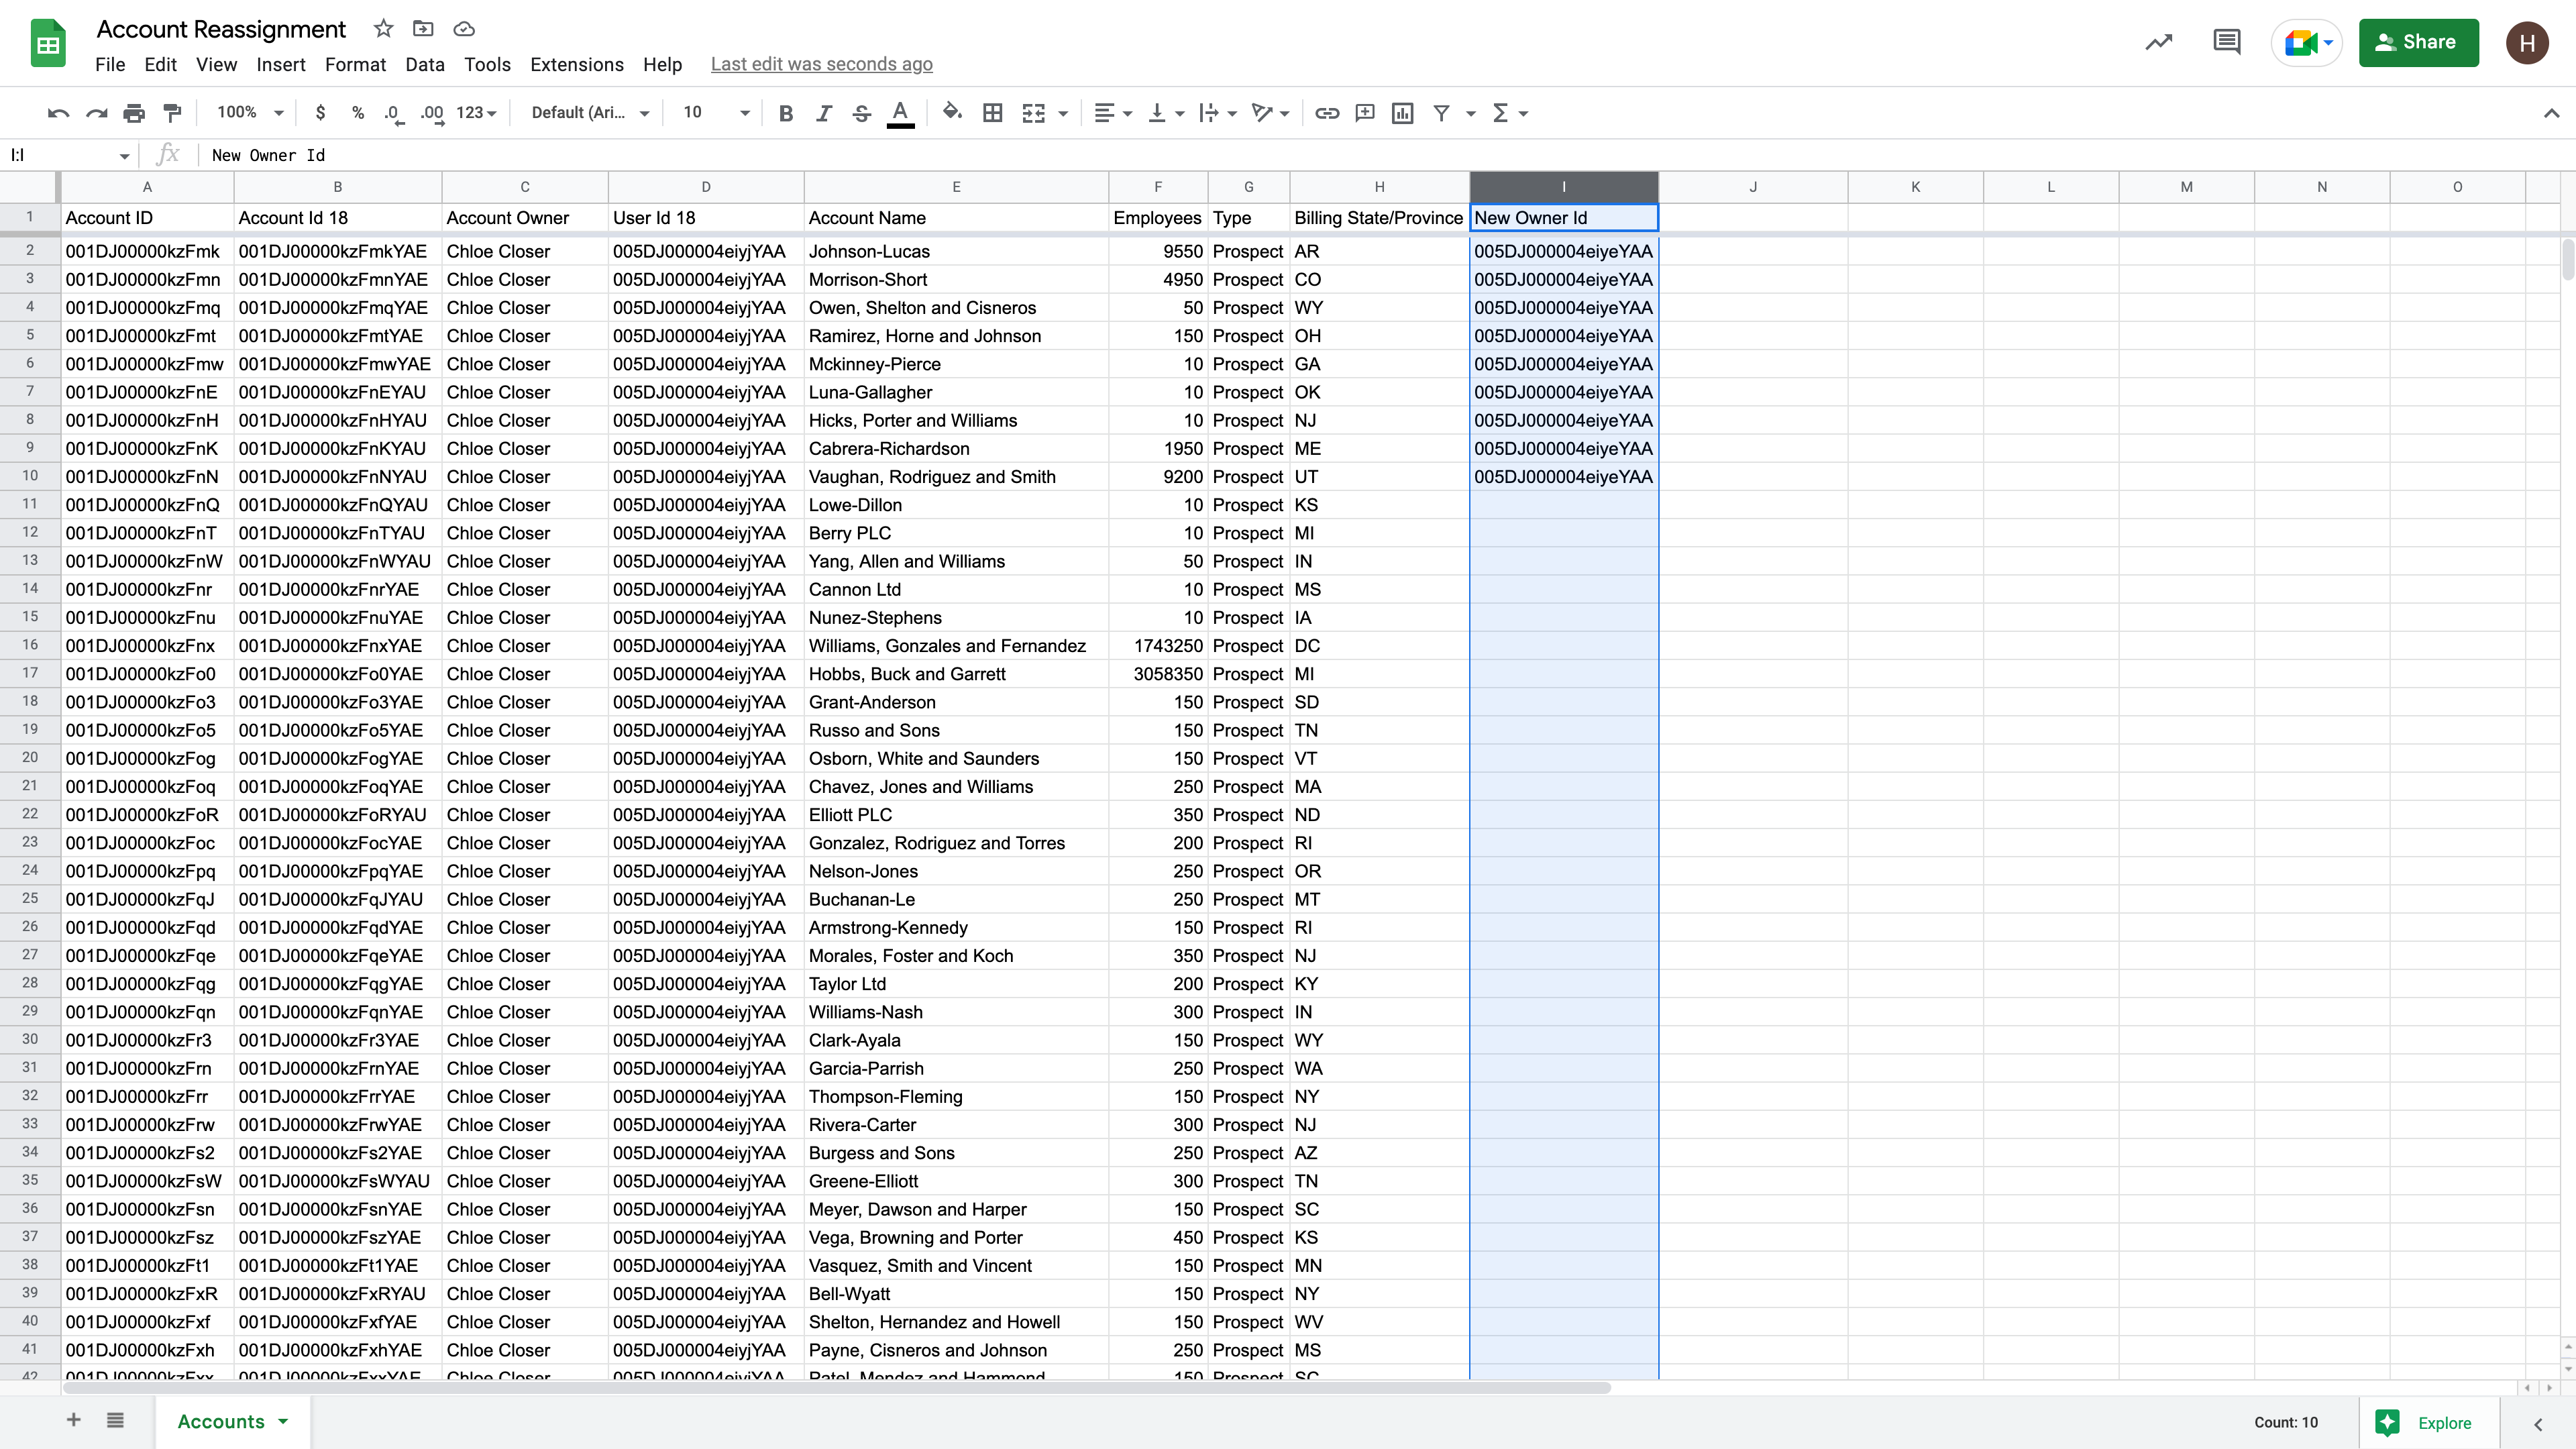
This is simple to do, but pretty error-prone. It's easy to put in the wrong id or get these complicated strings of numbers and letters mixed up.
The VLOOKUP version
It's a lot easier to use names instead of Ids. That's where VLOOKUP can be your friend. Similar to how you exported the accounts, create a report to export your users. The report should contain Full Name as the first column and "User Id 18" as the second column like so:
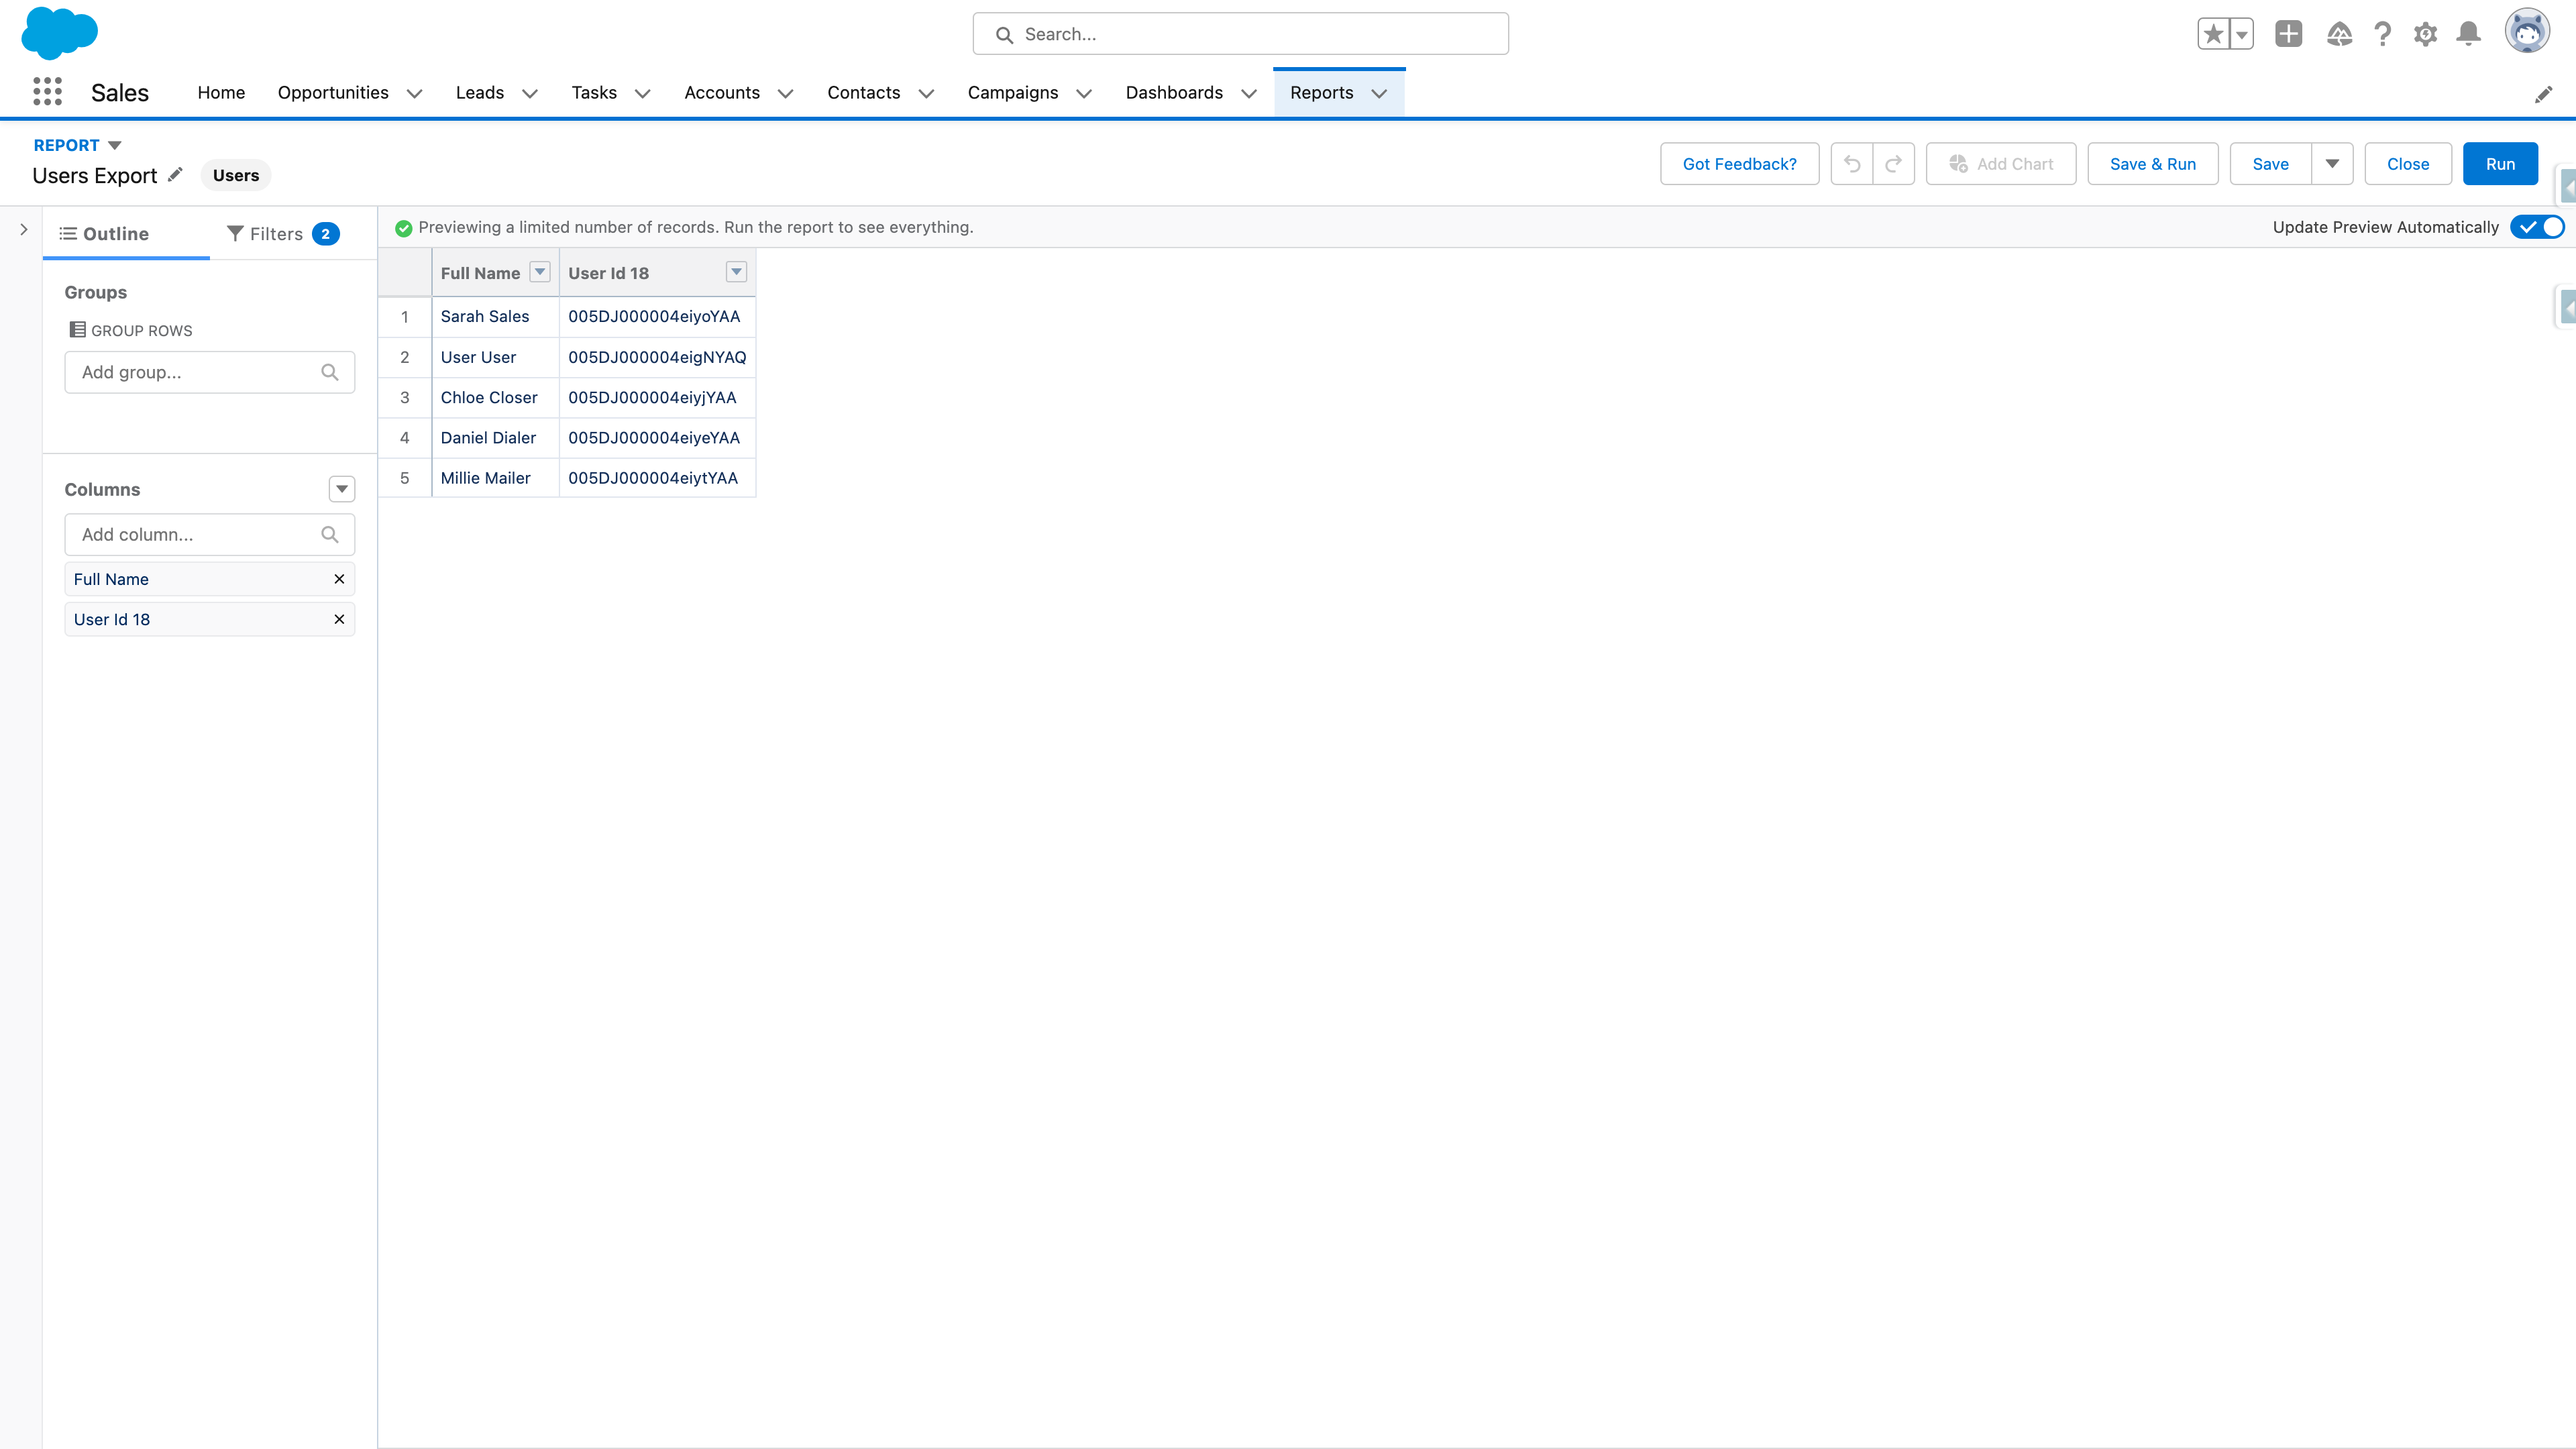
Download as a CSV and import into your spreadsheet as a 2nd tab. We'll assume this new worksheet is called "Users".
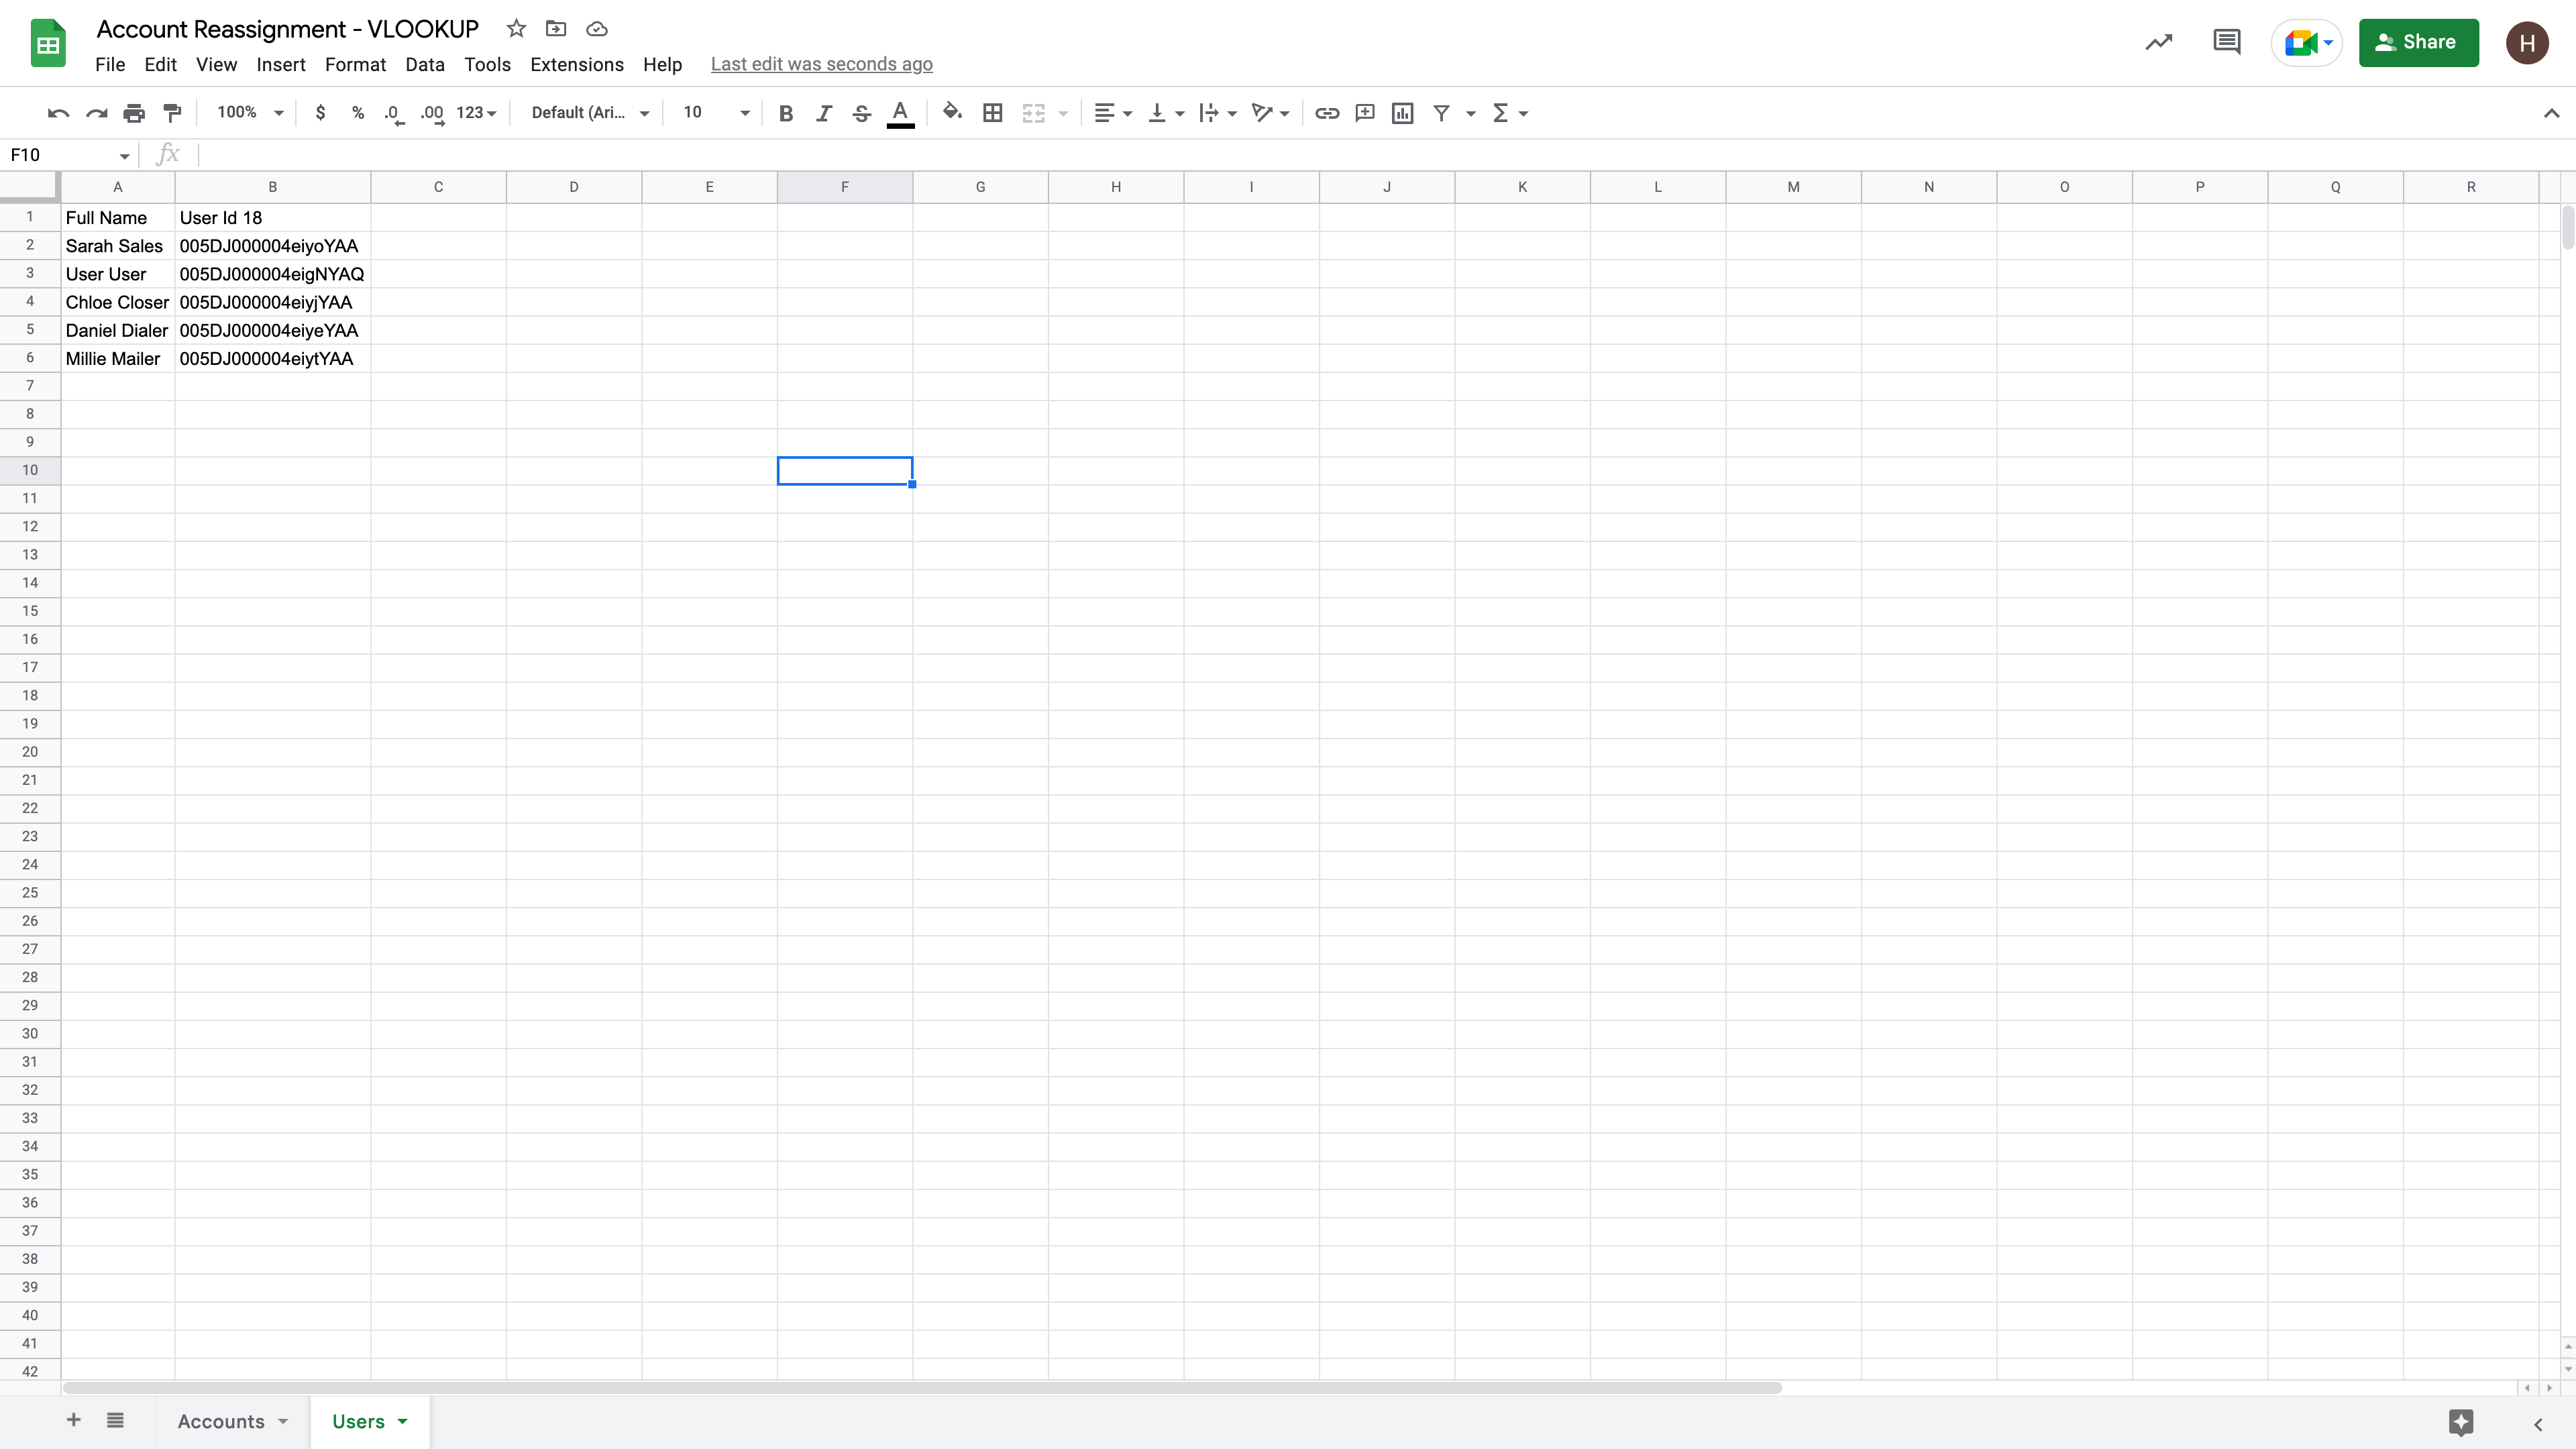
Back on the Accounts tab, create a two new columns called "New Owner Name" and "New Owner Id" like so:
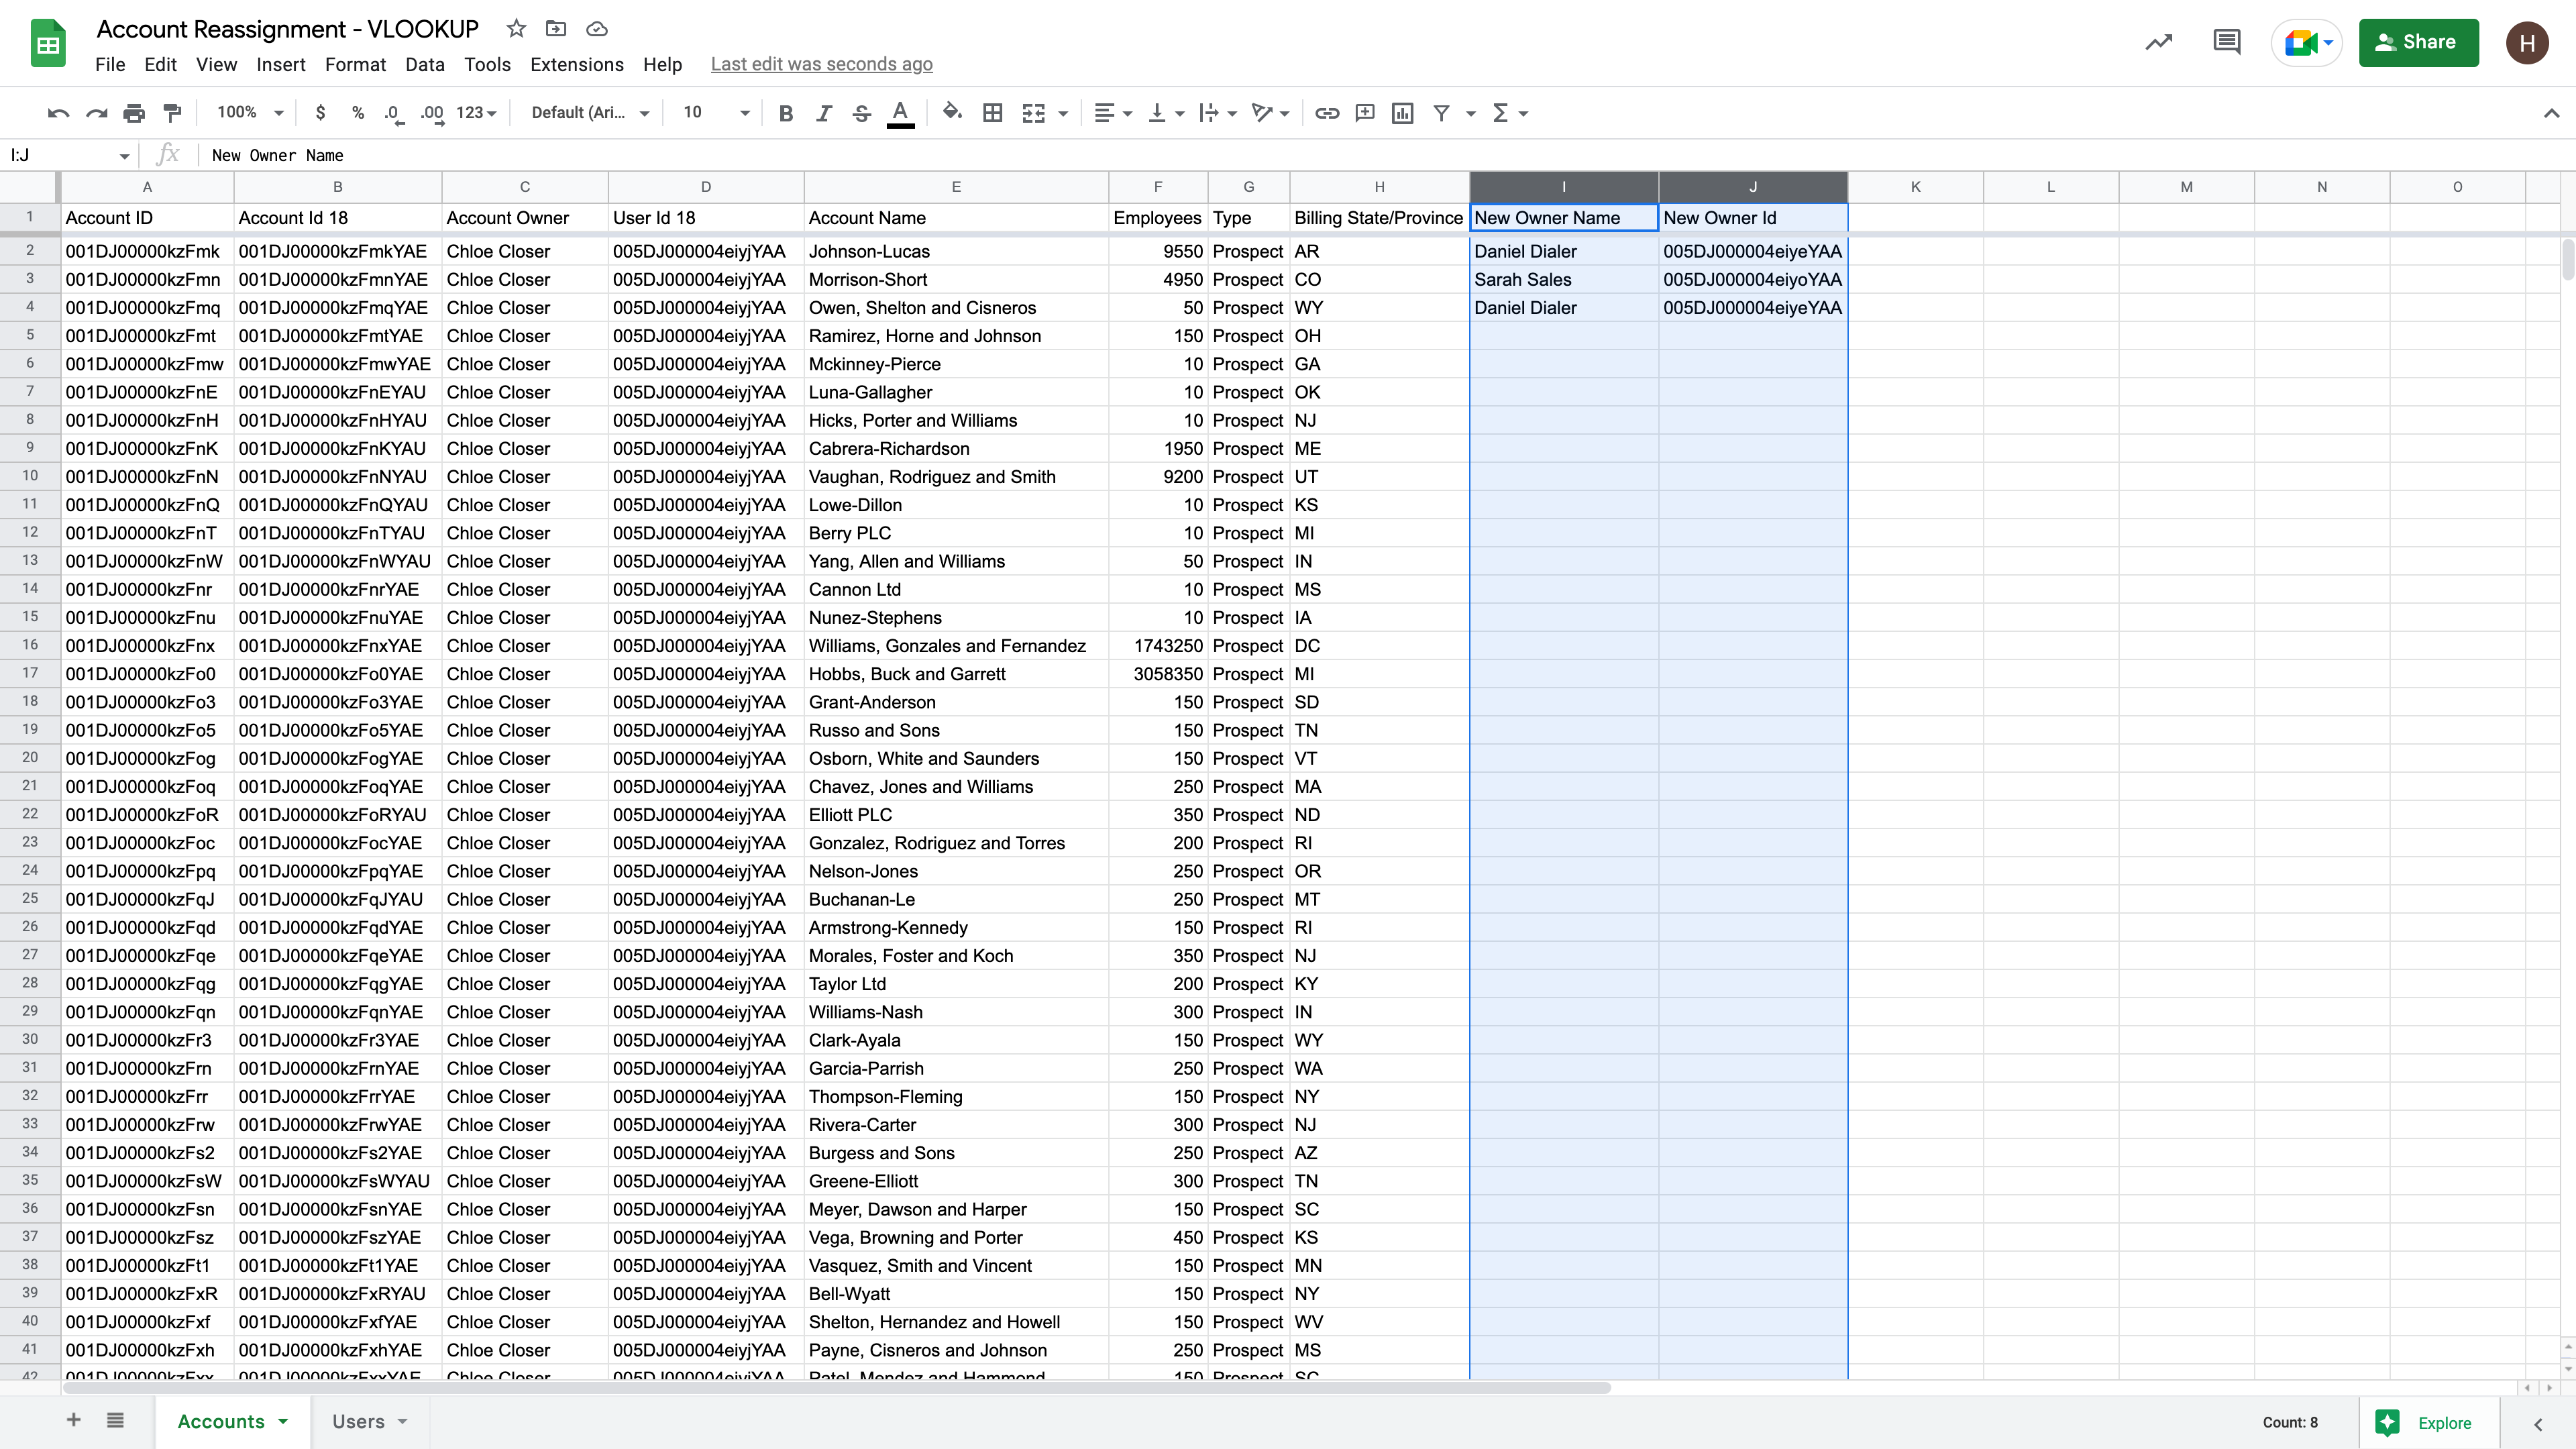
Put the name of the new owner in the New Owner Name column (Column I in our example). In the New Owner Id column (Column J in our example), enter a formula like: =VLOOKUP(I2,Users!$A$2:$B$6,2,FALSE). You'll need to adjust the actual values to reflect your specific New Owner Name column and the range that contains your user list.
Now, you can just type a name in the New Owner Name column and their id will populate in the New Owner Id column. It's easier to use than the simple version but note that this will break if you happen to have two users with the exact same name.
More complex ownership changes
The prior two examples have assume you're doing a pretty basic replace where you have a handful of accounts and you know exactly which accounts should go to which user. It gets complicated fast.
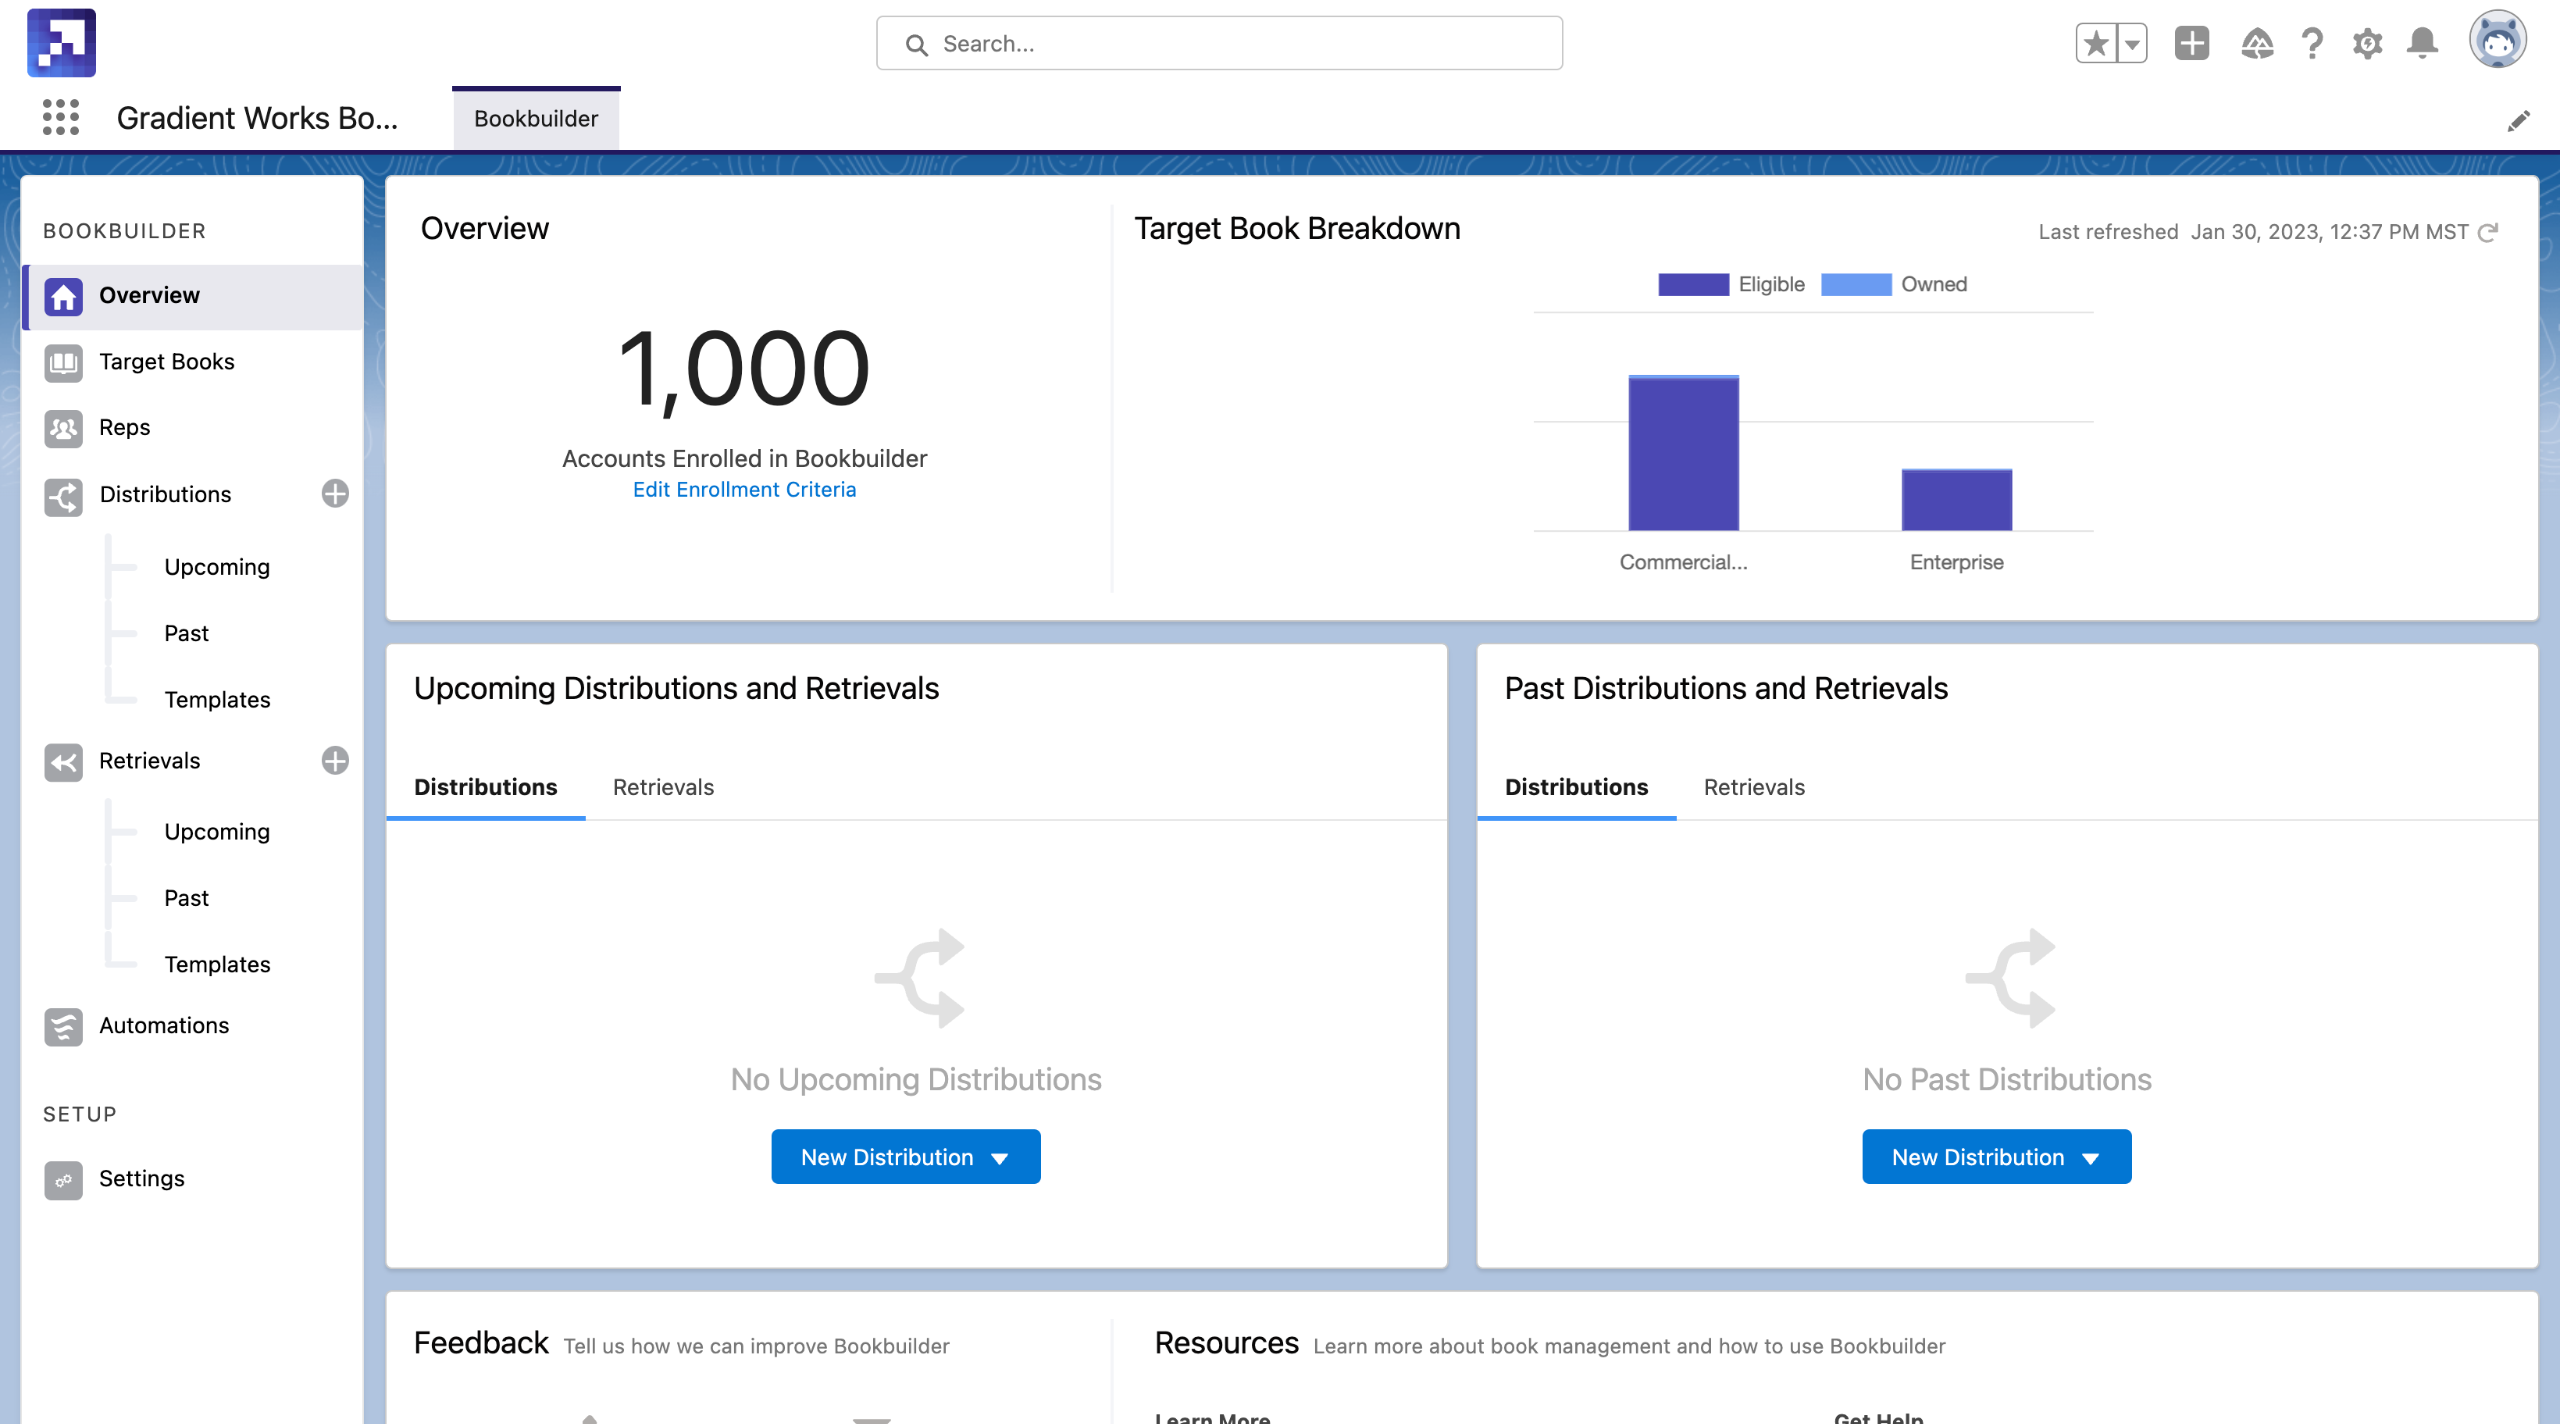
For example, say you're doing a mass transfer of of a set of accounts (e.g. from a trade show or because you're rebalancing territories) and you want to distribute those evenly across a set of users. There aren't many good options in a spreadsheet. You can, for example, sort the accounts on some criteria (e.g. Employee Count descending) and then manually set the New Owner Id in a round-robin fashion. It's extremely tedious and error prone. If you need to do this sort of thing a lot, you really should take a look at Gradient Works Bookbuilder and stop doing this in spreadsheets.
Regardless of the process for getting there, you just need to make sure that the "New Owner Id" column contains the id of, well, the new owner so you can import it into Salesforce in the next step.
Note that in most cases you can leave New Owner Id blank for any records where you don't want the owner to change. Those rows will be ignored during the import step.
Export the new CSV
Once you're done updating the New Owner Id for each account you want to change, export/save the file as a CSV. This varies by spreadsheet program. In Google Sheets, go to File -> Download -> Comma Separated Values (CSV). In Excel, go to File -> Save As and select "Comma Separated Values (.csv) as the file format.
3. Import back into Salesforce
You've got a few options when you're ready to upload the data to Salesforce and actually bulk update the account owner:
- Salesforce Data Loader is a desktop application from Salesforce. Just don't. It's old and clunky and weird.
- dataloader.io won't win any UI awards but it's web based and it works well. You can do 10k uploads per month for free. If you have more than that it'll cost you.
- Salesforce Inspector is a chrome extension that's widely used (400k+ users) and beloved (5 stars). You really shouldn't use Salesforce without it. It's maybe not as robust as dataloader.io but it provides a handy way to do data import.
- Salesforce also offers a data import wizard. It's very simplistic and I have honestly never seen anyone actually use it.
We'll use dataloader.io for our example because it's the most user friendly and flexible (despite having a UI that seems to have been crafted in 2008 or so).
The first thing you'll need to do is log into dataloader.io and connect it to your Salesforce. I'm not including those steps here but it should be pretty self explanatory.
Once you're in, click NEW TASK at the top left. It'll open a dialog like so:
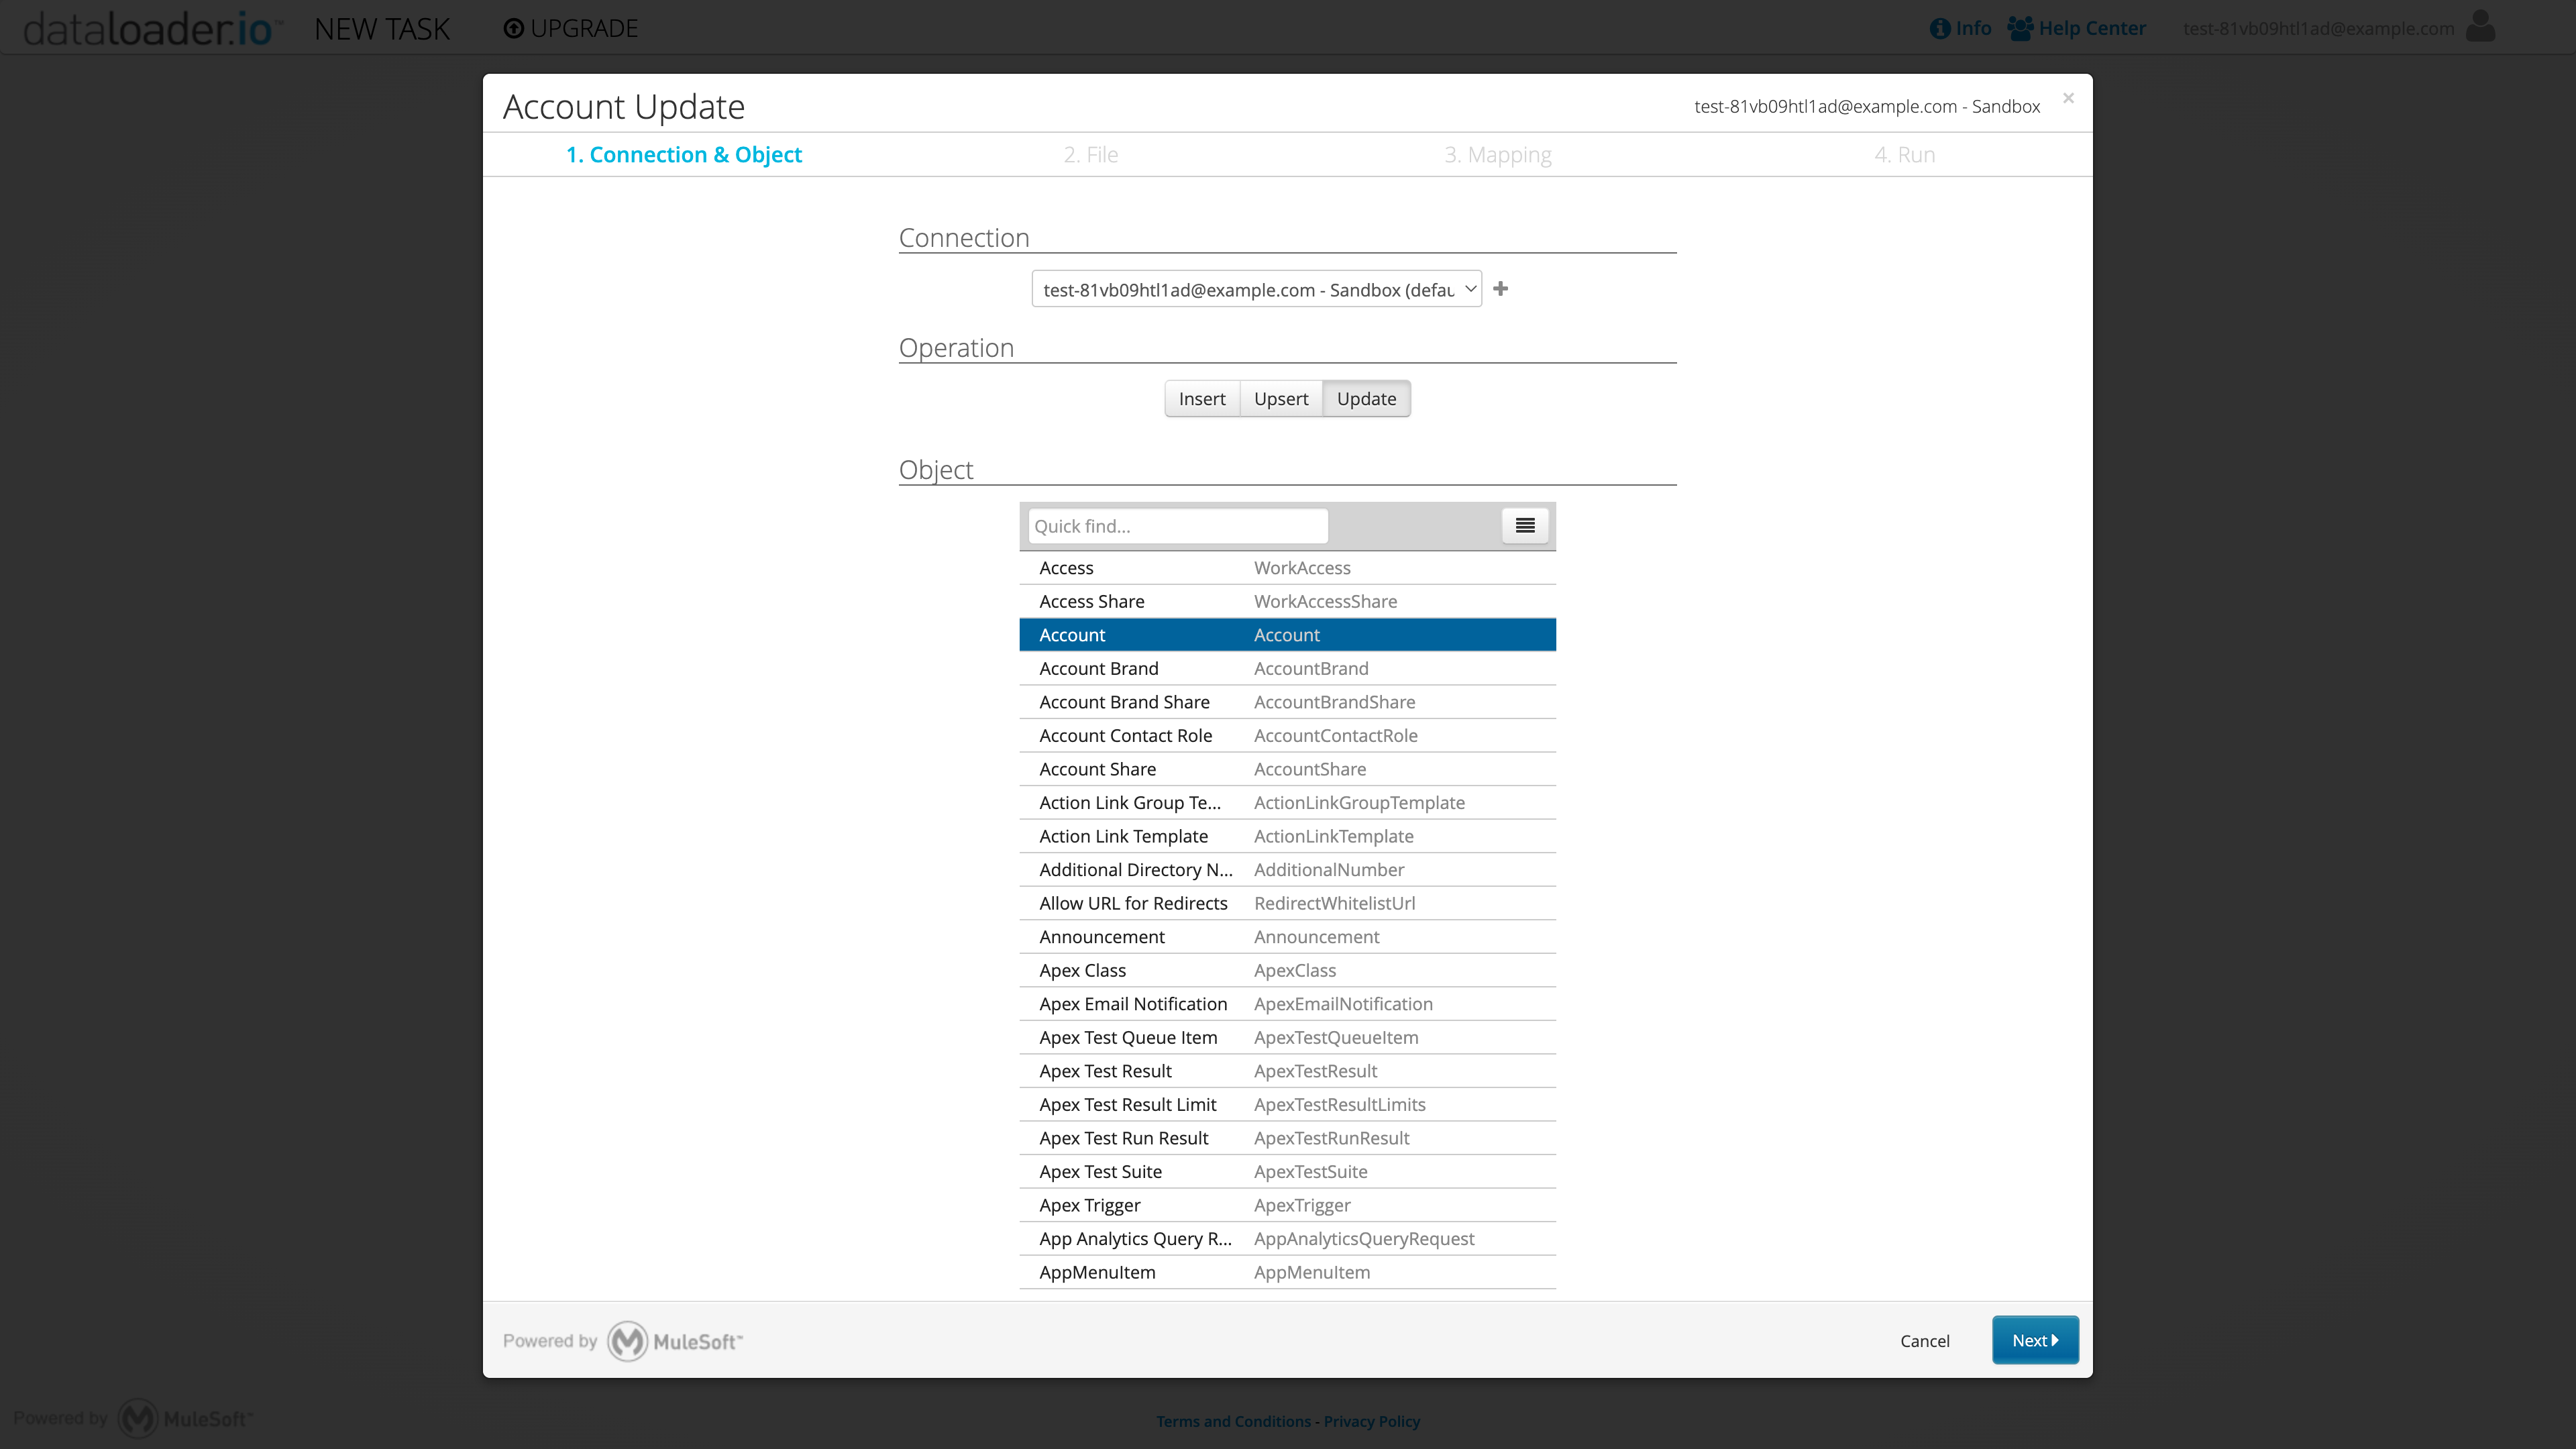
You're updating the owner on account, so this is pretty simple. Tell it the operation is Update and the Object is Account. Then click Next.
You'll see a screen like this one that lets you map the fields you plan to import:
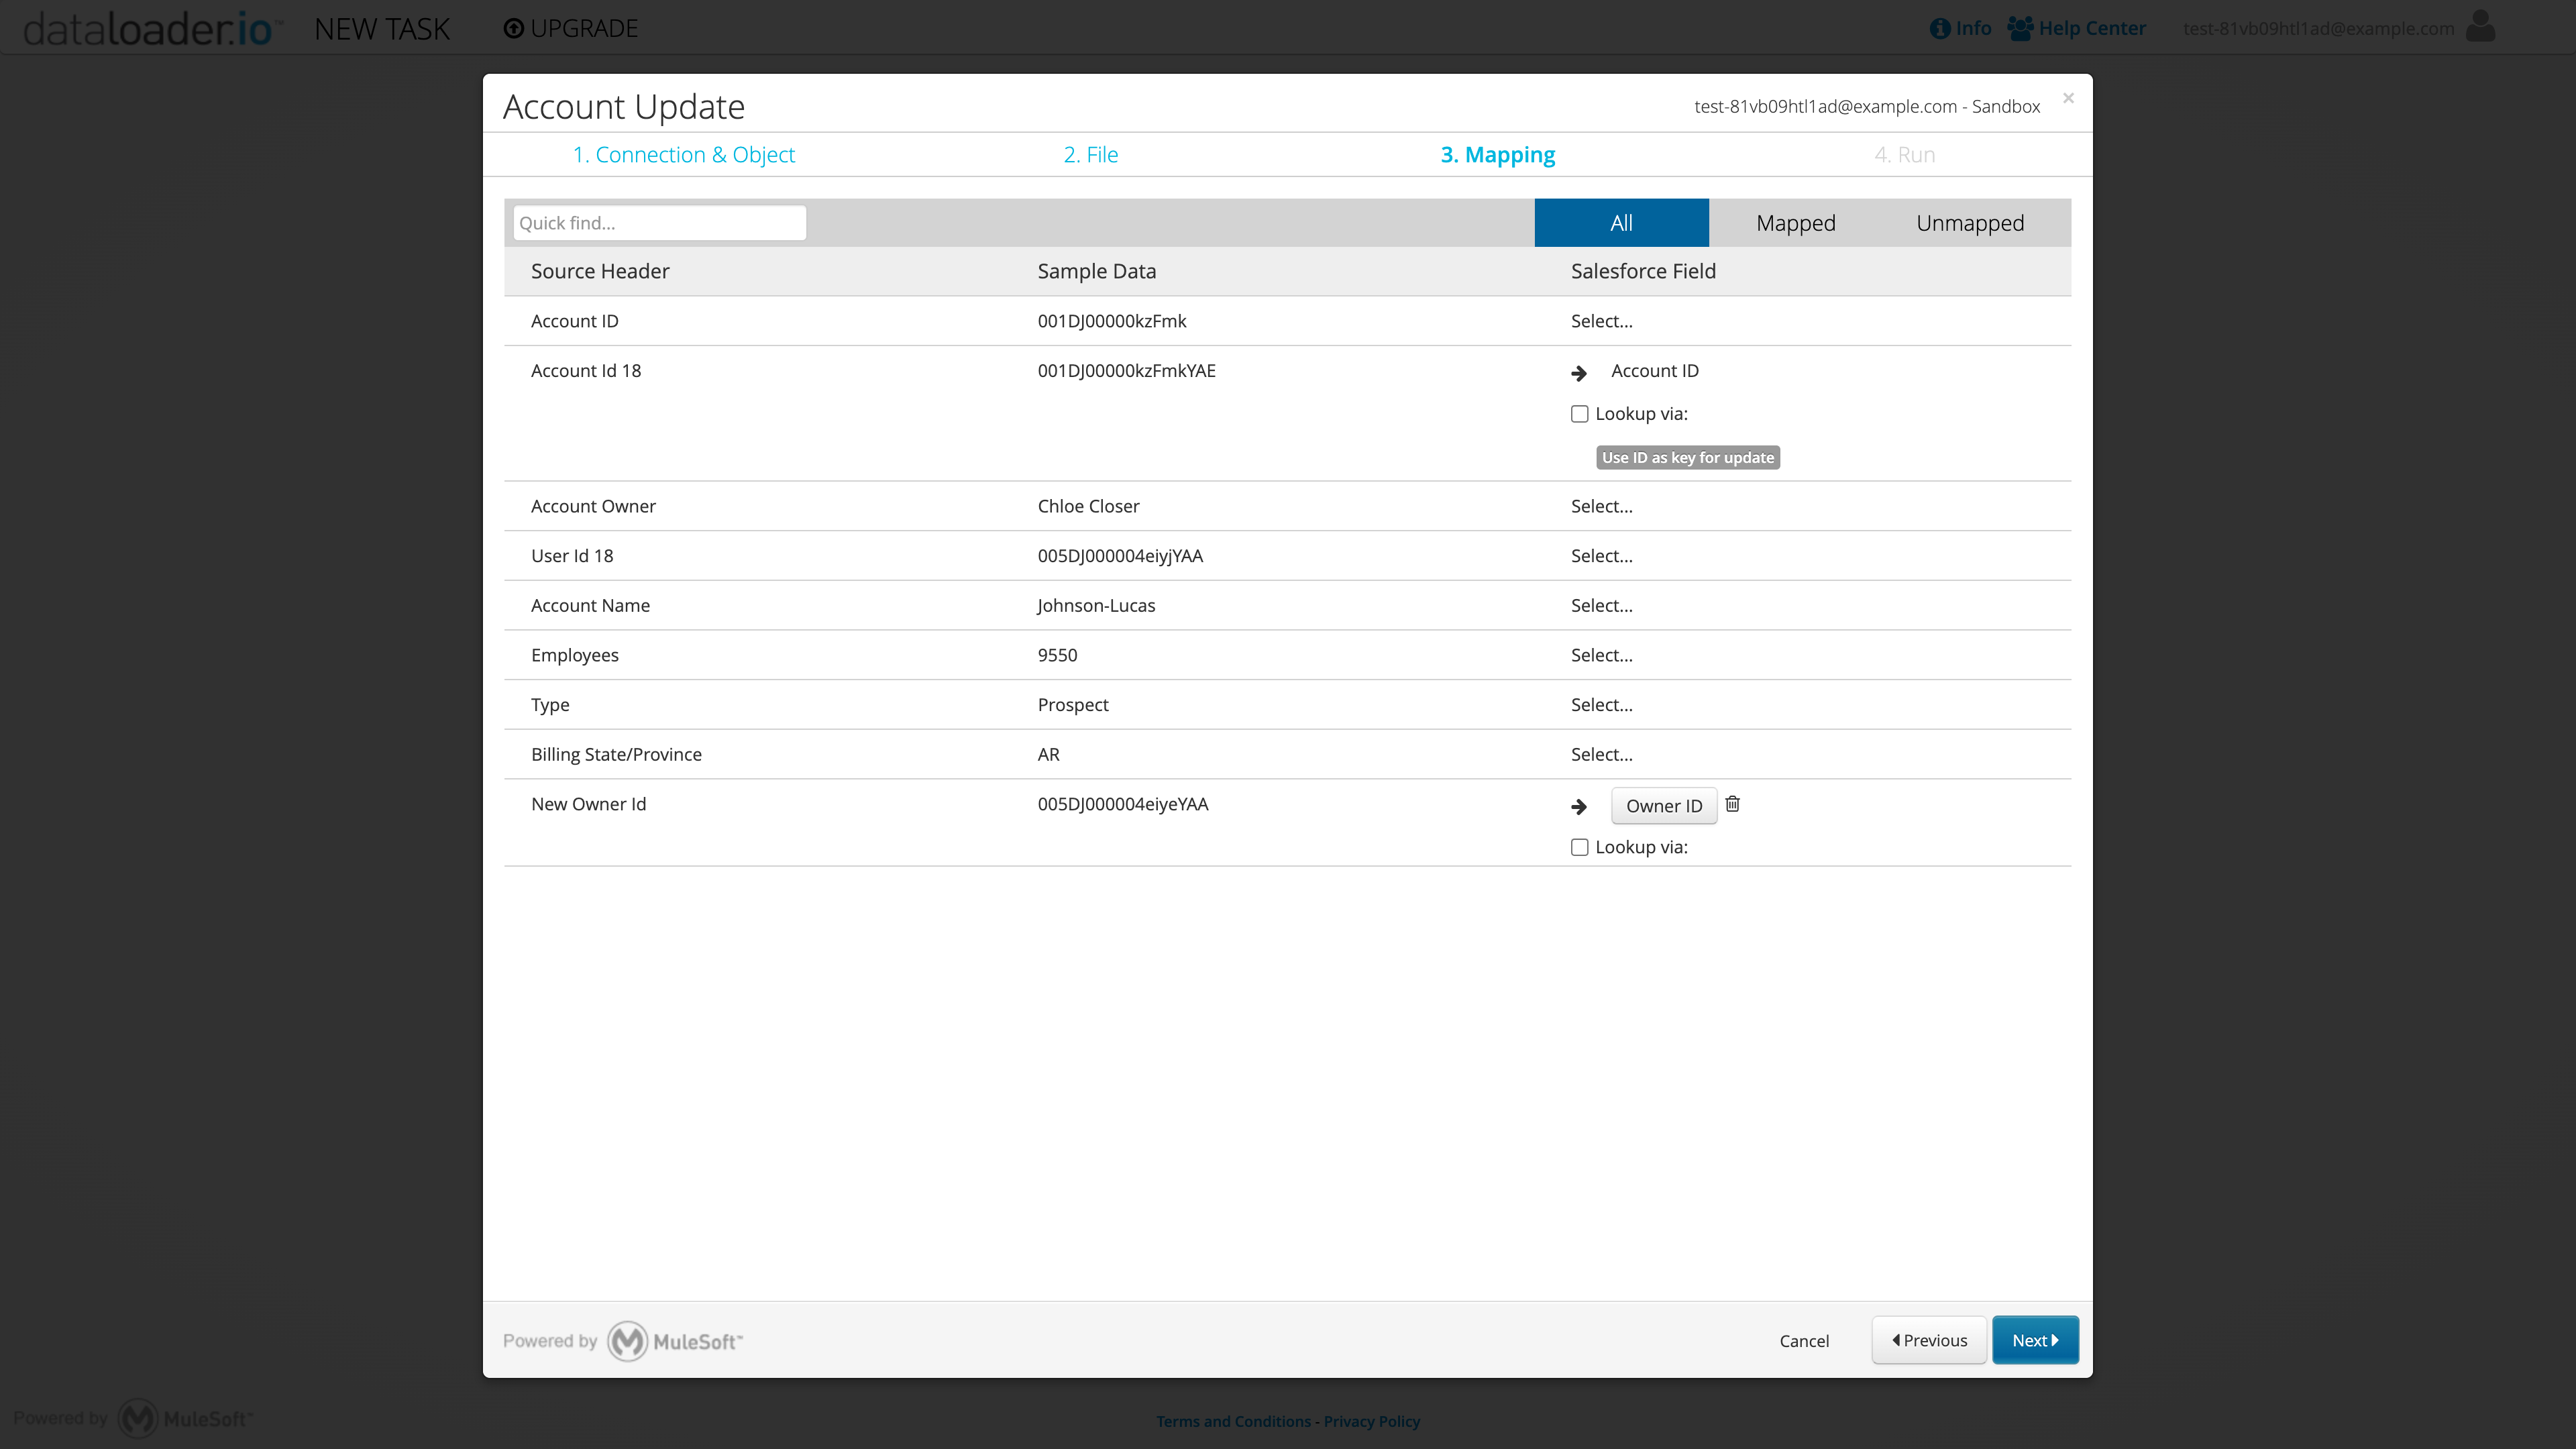
In this case we have both the 15 digit "Account Id" and the 18 digit "Account Id 18" fields. I've configured it to use the "Account Id 18" field as the unique id to match with existing records. You can use either in this case. Find your "New Owner Id' field and map that to the Owner. Unless you want to update other fields deselect all of them from the mapping. The click Next.
The final screen provides some advanced options like so:
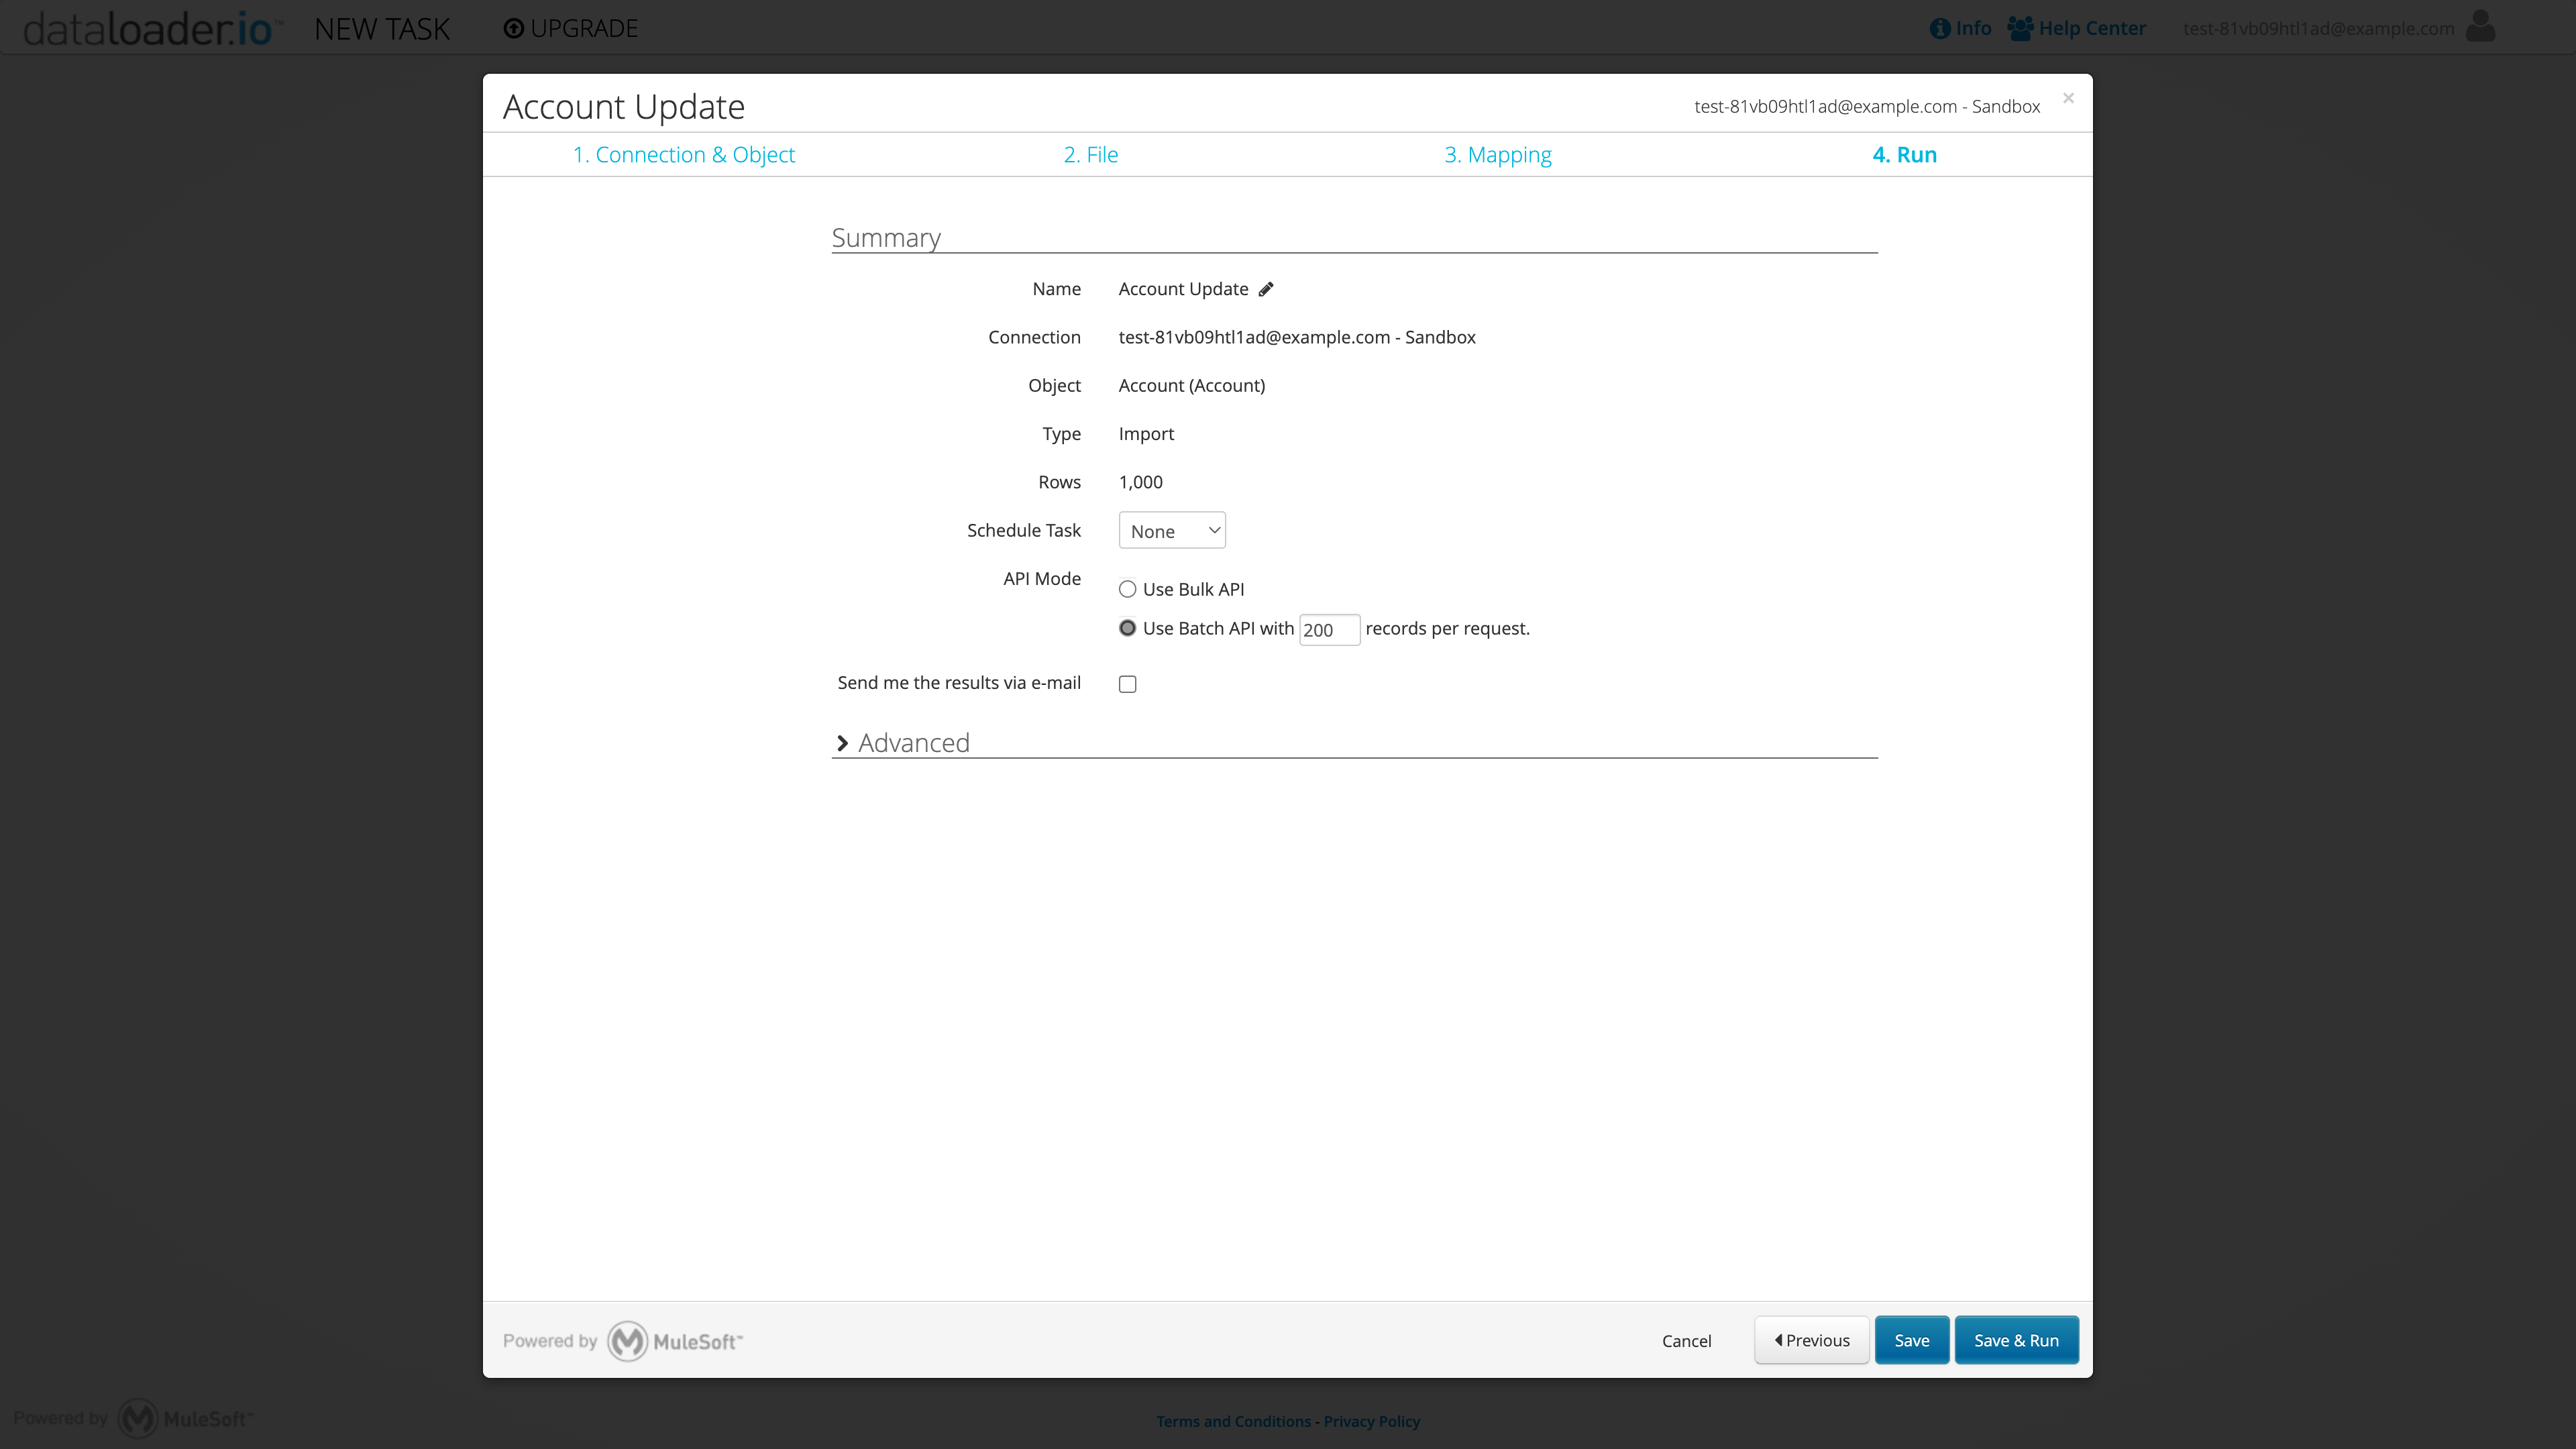
If you run into any errors with the data load or know that your org has a lot of background automations, change the batch size from 200 to a much smaller number, like 20. Click Save & Run.
After a few minutes you should see your task complete:
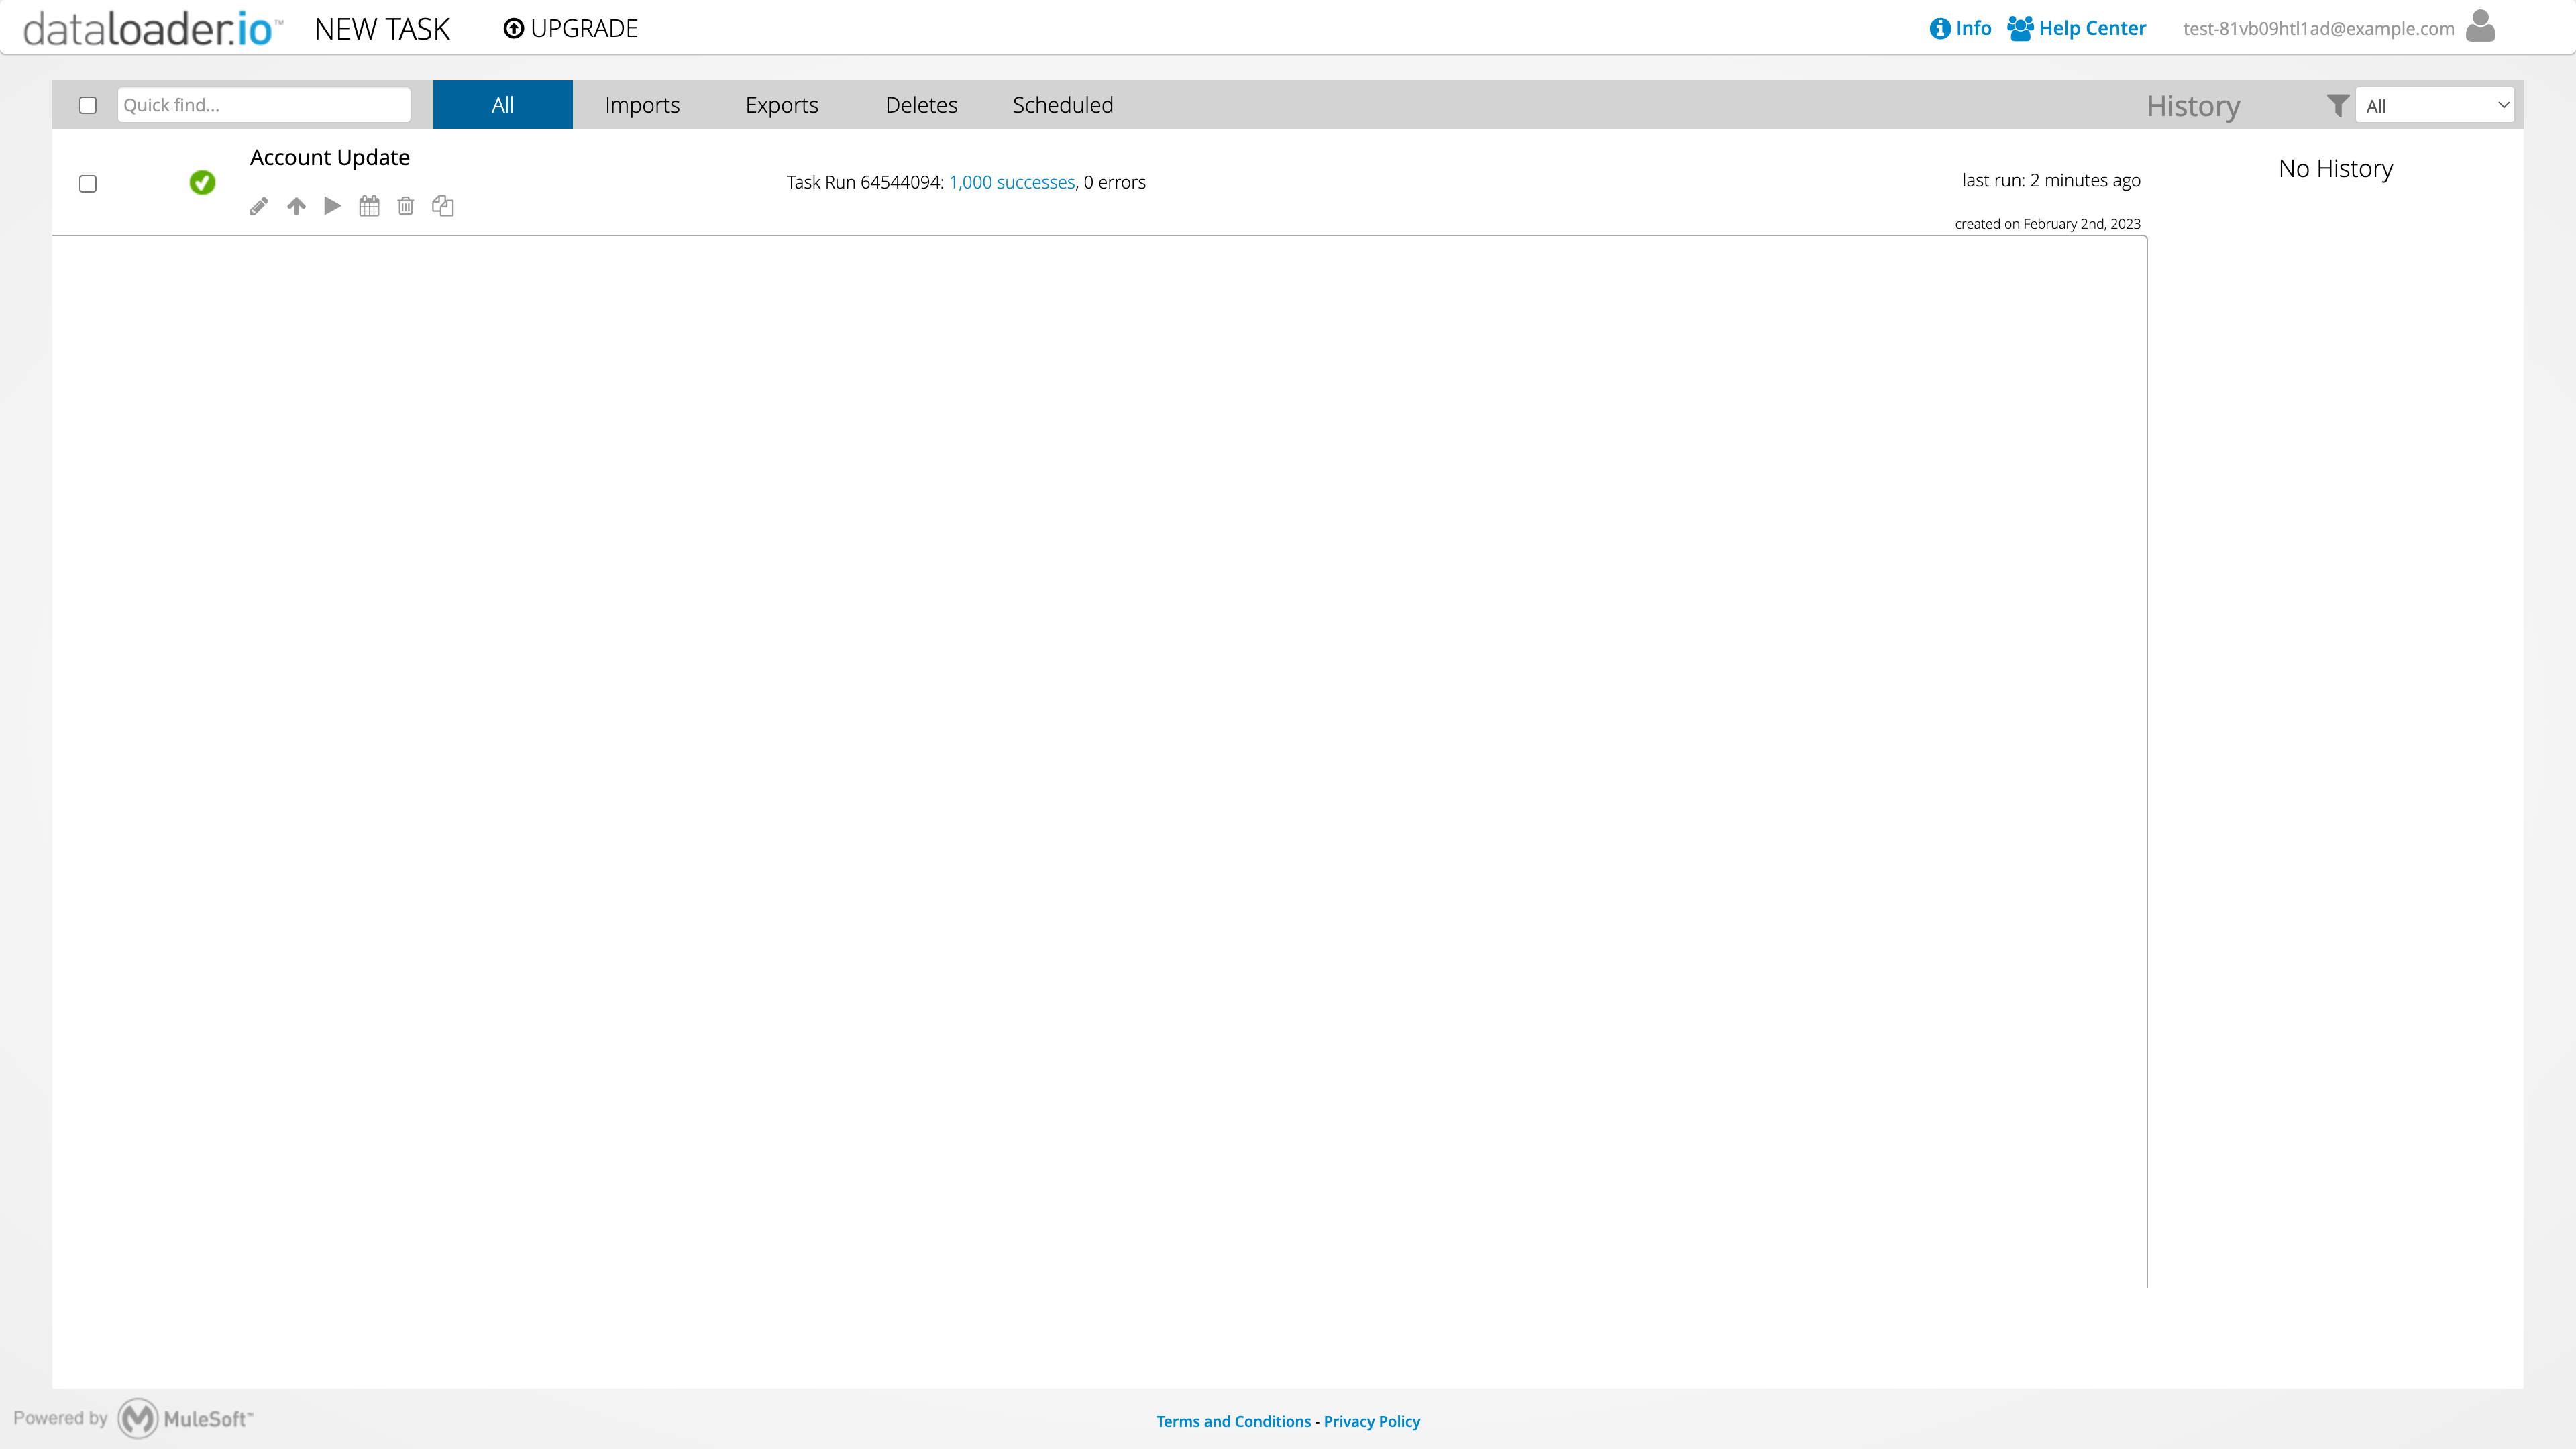
If you see errors, go back and check that you've specified the right ids. One common cause of errors is trying to assign ownership on Account to an inactive user.
Wrapping up
I've seen some pretty gnarly processes and some pretty huge spreadsheets that folks use to mass transfer accounts in Salesforce. This guide is just the tip of the iceberg. If you're doing this manually, though, the basic steps will be the same as outlined above.
By the way, if you don't want to have to change Salesforce account owners manually in spreadsheets every time a rep leaves or a new rep is hired or if you find yourself constantly shuffling accounts to balance rep books, take a look at the Gradient Works tour down below. We can help.
Gradient Works Bookbuilder replaces tedious account spreadsheets